How to transfer contacts from Nokia 301 to Windows


Transfer contacts from your Nokia 301 to the cloud server
We used PhoneCopy.com service for this guideline. Using it, your can backup your contacts from your Nokia 301 easily. The whole backup, including the settings, can be done in several minutes.
This guideline also works for similar devices like Nokia 207, Nokia 208, Nokia 515, Nokia 515 Dual SIM, Nokia Asha 300, Nokia C3-01, Nokia X3-02.
To have your contacts saved you have to synchronize the Nokia with PhoneCopy. For better illustration, we've made some screenshots. The first step is create of synchronization account.


Fill in "Account name" (write PhoneCopy) and "Server address" (http://www.phonecopy.com/sync)


Now you need to fill in your "Username" and "Password".


Select "Contacts database" and to "Database address" write contacts.


Select "Calendar database" and to "Database address" write calendar.


Select "Notes database" and to "Database address" write notes.


Choose, if you want to "Use pref. acces pt." and press 3x "Back".

Now you need to select "Sync settings".


If you have Nokia 515 Dual sim, select "SIM" for synchronisation, choose "PhoneCopy" account and press 2x Back.


Select "Synchronised data", mark "Contacts" and press "Done".


Choose, if you want to use "Automatic sync" and press "Back".

Now you can start synchronisation.

And now it's time to transfer data to your Windows
Download PhoneCopy for Windows to your Windows PC, which you can download free of charge. After downloading and installation PhoneCopy icon will appear on your desktop.
Start the application and small PhoneCopy icon will appear on right bottom corner of your screen on status bar. When you will press this icon at first time you will be asked to fill your username and password. Any next icon click will start synchronization.

Start PhoneCopy for Windows. Fill your PhoneCopy username and password, then select the local directory where you stored your contacts, and choose VCARD format which will be used (we recommend to use 3.0 which is pre-selected - this is the right option when you are looking to import contacts from .vcf). Another option is to use native Windows Contacts format and synchronize directly from/to Contacts folder. Moreover, you can set your proxy on the same screen.

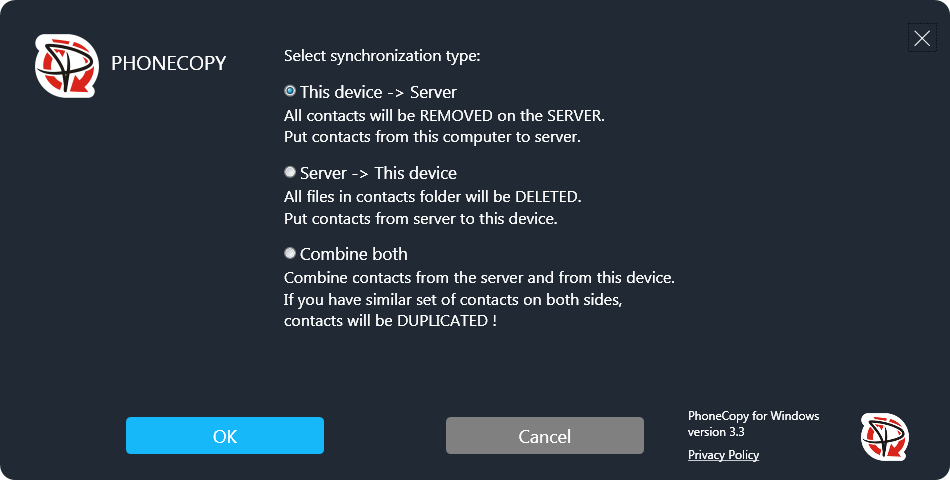
Now you can start the first synchronization on your Windows to transfer your contacts from/to PhoneCopy server. When synchronizing for the first time you can select synchronization direction. When you will add any VCARD contacts to selected directory you will see it synchronized to PhoneCopy after next sync. Status bar icon is animated during synchronization process.

When synchronization finish you will get confirming message.
This guideline also works for similar devices like Microsoft Windows 2000, Microsoft Windows 2003, Microsoft Windows 2008, Microsoft Windows 7, Microsoft Windows 8.1, Microsoft Windows 98, Microsoft Windows ME, Microsoft Windows Vista, Microsoft Windows XP.
Now you have all your contacts backed up on PhoneCopy and you can edit all your contacts in your online account. If you lose your phone or the stored data, or if you just run out of battery, you can see your contacts online.
Some additional tips:
Just as a reminder, the contacts are transferred via your mobile phone service provider, so you need to have data plan activated for the service to work. If you don't have a special data scheme, your carrier will charge you additional fees.


