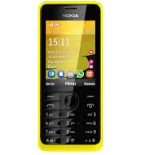
Transfer contacts from your Nokia 301 to the cloud server
In our guideline we will introduce PhoneCopy.com service which supports many phones from almost all manufacturers, including Nokia 301, and can be easily used to synchronize data between two or more devices.
This guideline also works for similar devices like Nokia 207, Nokia 208, Nokia 515, Nokia 515 Dual SIM, Nokia Asha 300, Nokia C3-01, Nokia X3-02.
To have your contacts saved you have to synchronize the Nokia with PhoneCopy. For better illustration, we've made some screenshots. The first step is create of synchronization account.


Fill in "Account name" (write PhoneCopy) and "Server address" (http://www.phonecopy.com/sync)


Now you need to fill in your "Username" and "Password".


Select "Contacts database" and to "Database address" write contacts.


Select "Calendar database" and to "Database address" write calendar.


Select "Notes database" and to "Database address" write notes.


Choose, if you want to "Use pref. acces pt." and press 3x "Back".

Now you need to select "Sync settings".


If you have Nokia 515 Dual sim, select "SIM" for synchronisation, choose "PhoneCopy" account and press 2x Back.


Select "Synchronised data", mark "Contacts" and press "Done".


Choose, if you want to use "Automatic sync" and press "Back".

Now you can start synchronisation.

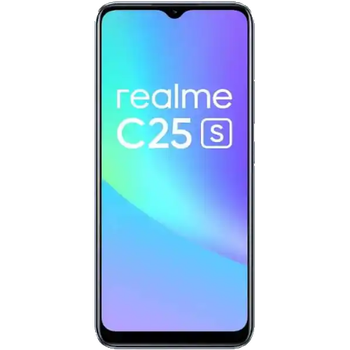
And now it's time to transfer data to your Realme C25 rmx3197
Download PhoneCopy for Android to your Android phone, which you can download free of charge. After downloading and installation, go through following steps.
Login
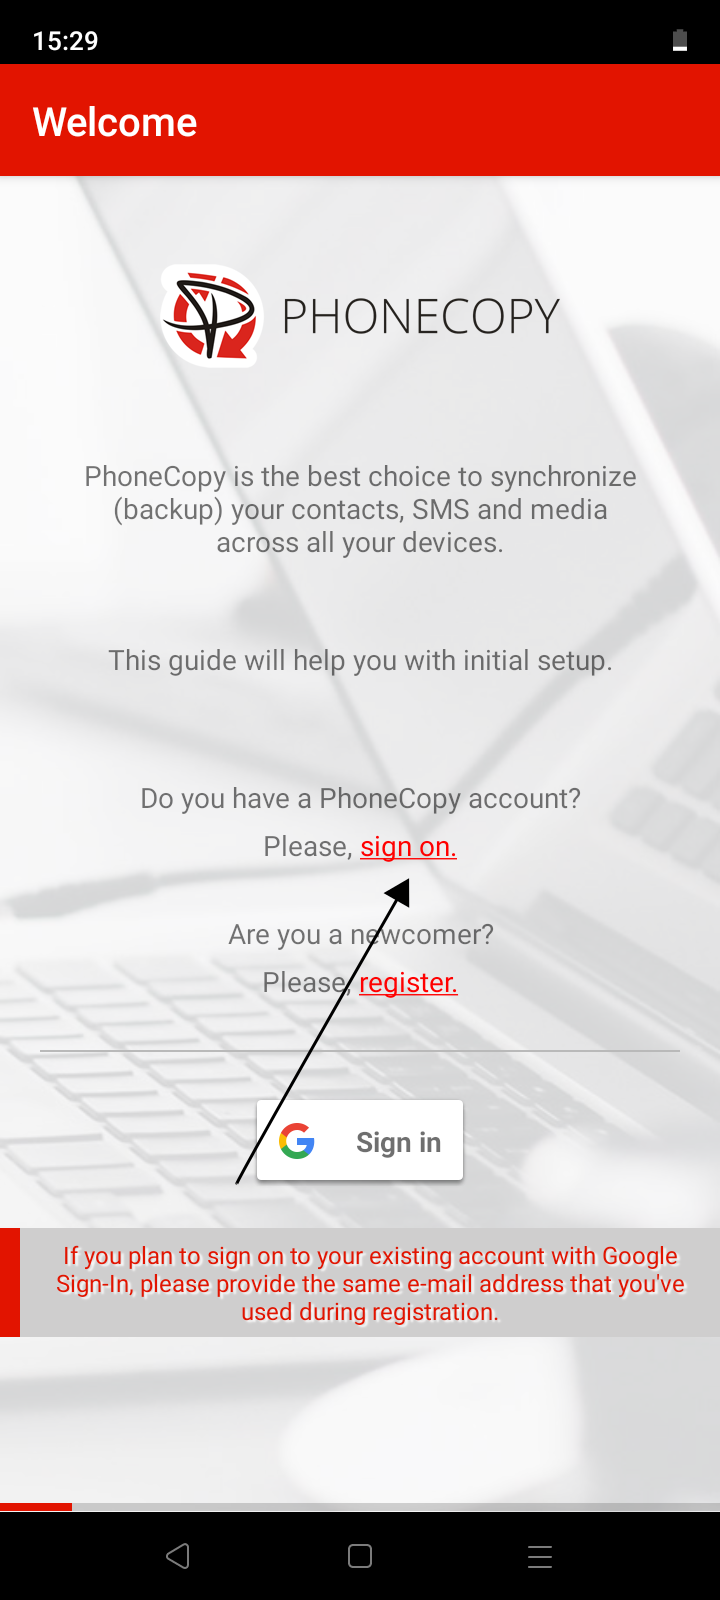
Launch the app and sign in to your existing account.
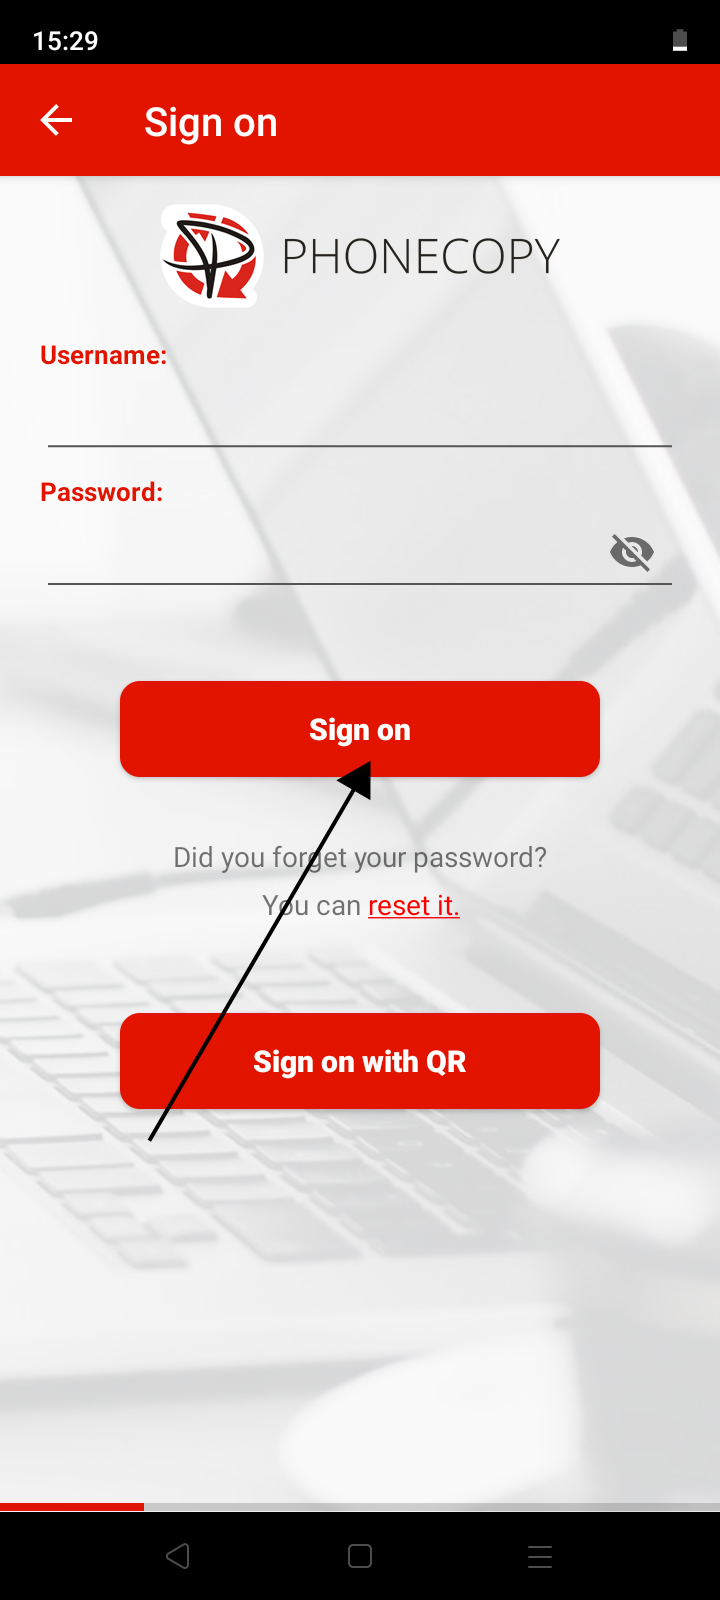
Using credentials
1. Launch the app and select sign on.
2. Fill in your username and password and press the Sign on button.
Using QR code
If you are going to transfer contacts, SMS or photos and videos from one phone to another, then the possibility of simply logging in another device using a QR code without the need to enter login credentials may come in handy.
A QR code for login is generated on the first phone and you scan the code with the second phone. The app must be allowed to access the camera to scan the code.
On the first phone:
1. Run the application. If you are not already signed in to your account, please sign in.
2. On the main screen of the application, select Show sign-on QR code in the upper left menu.
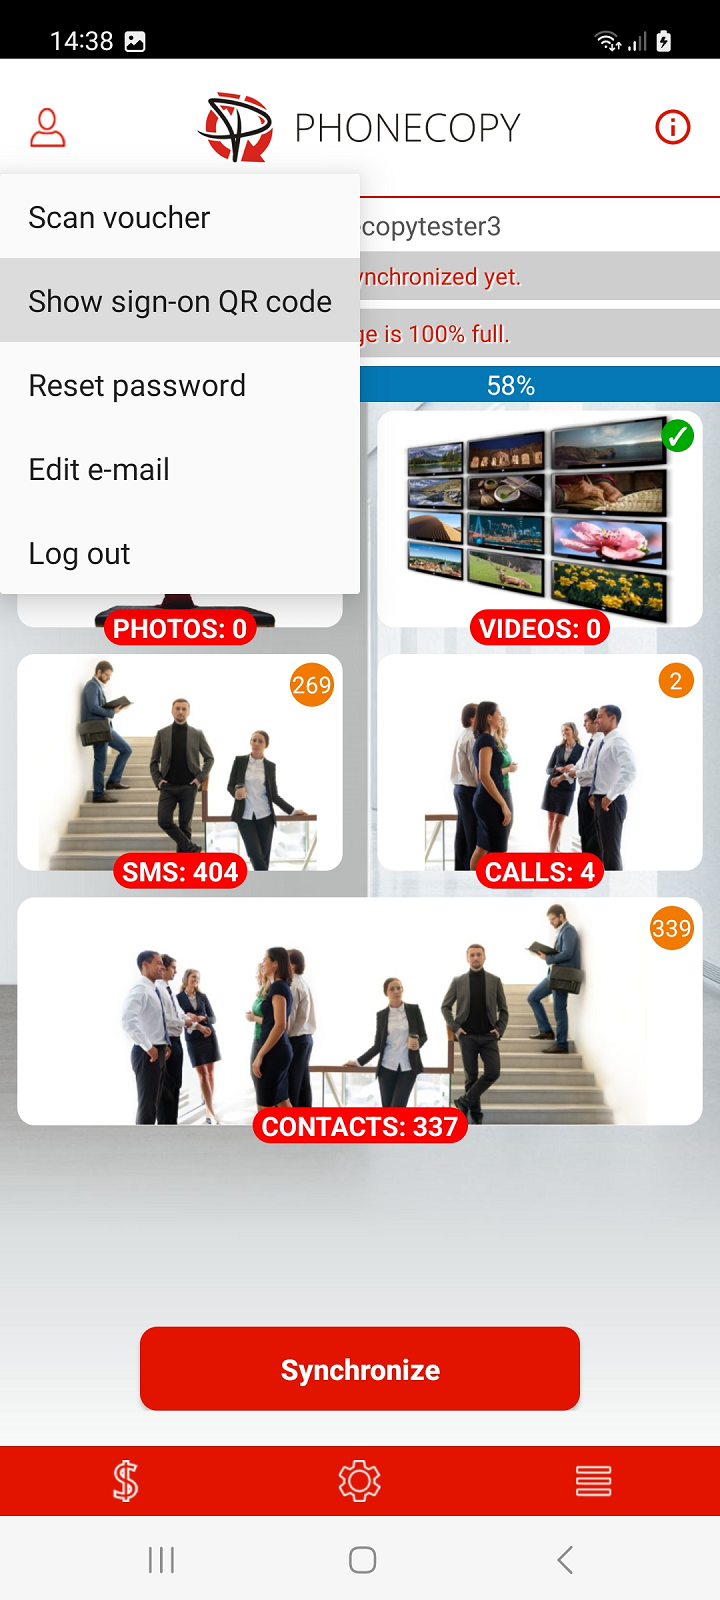
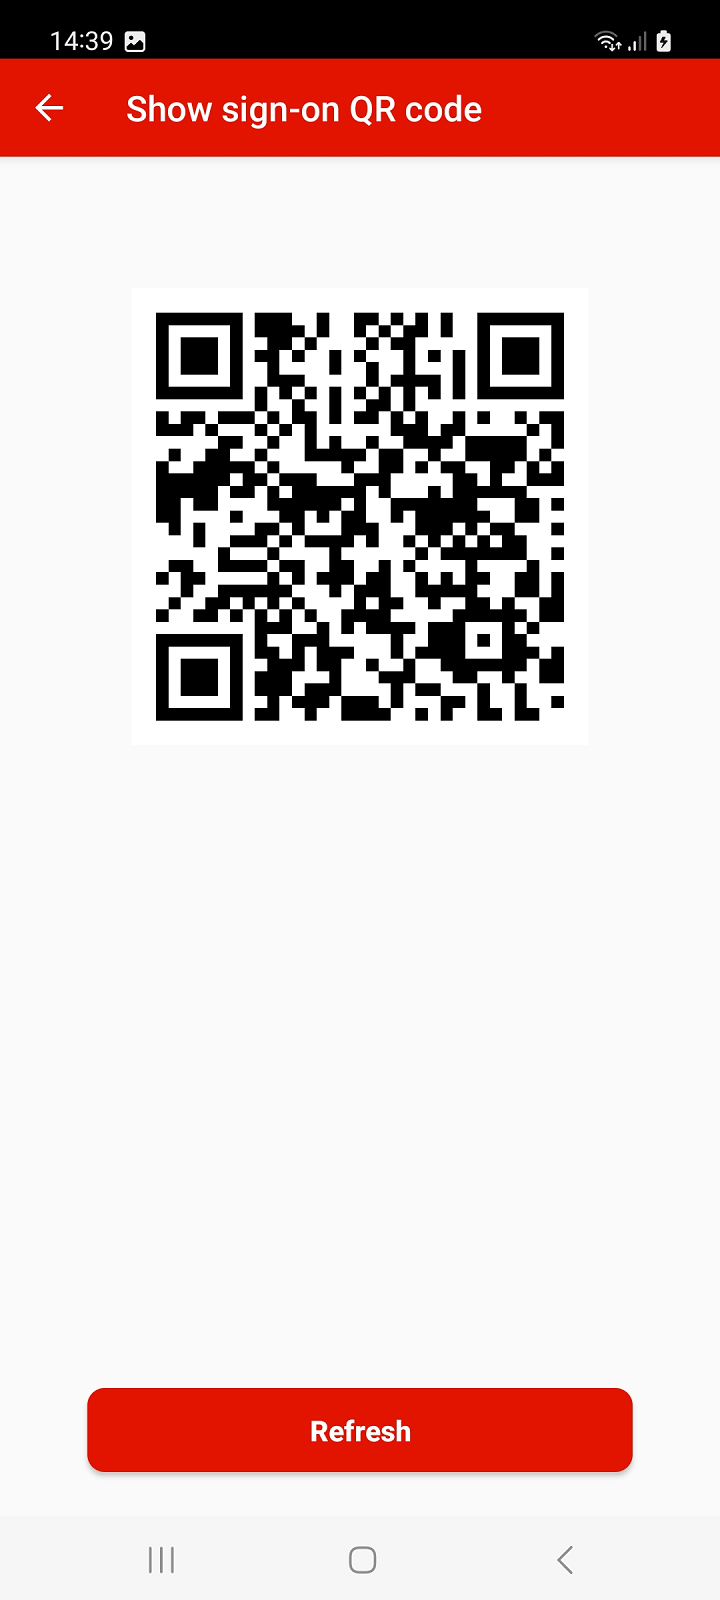
Note: The QR code for login can also be generated from your PhoneCopy account on the website. Sign in to your account at PhoneCopy and proceed to Settings > Devices > Add new device using QR code or use this link: Add a new device using QR code
On the second phone:
1. Run the app and select sign on.
2. Select Sign on with QR.
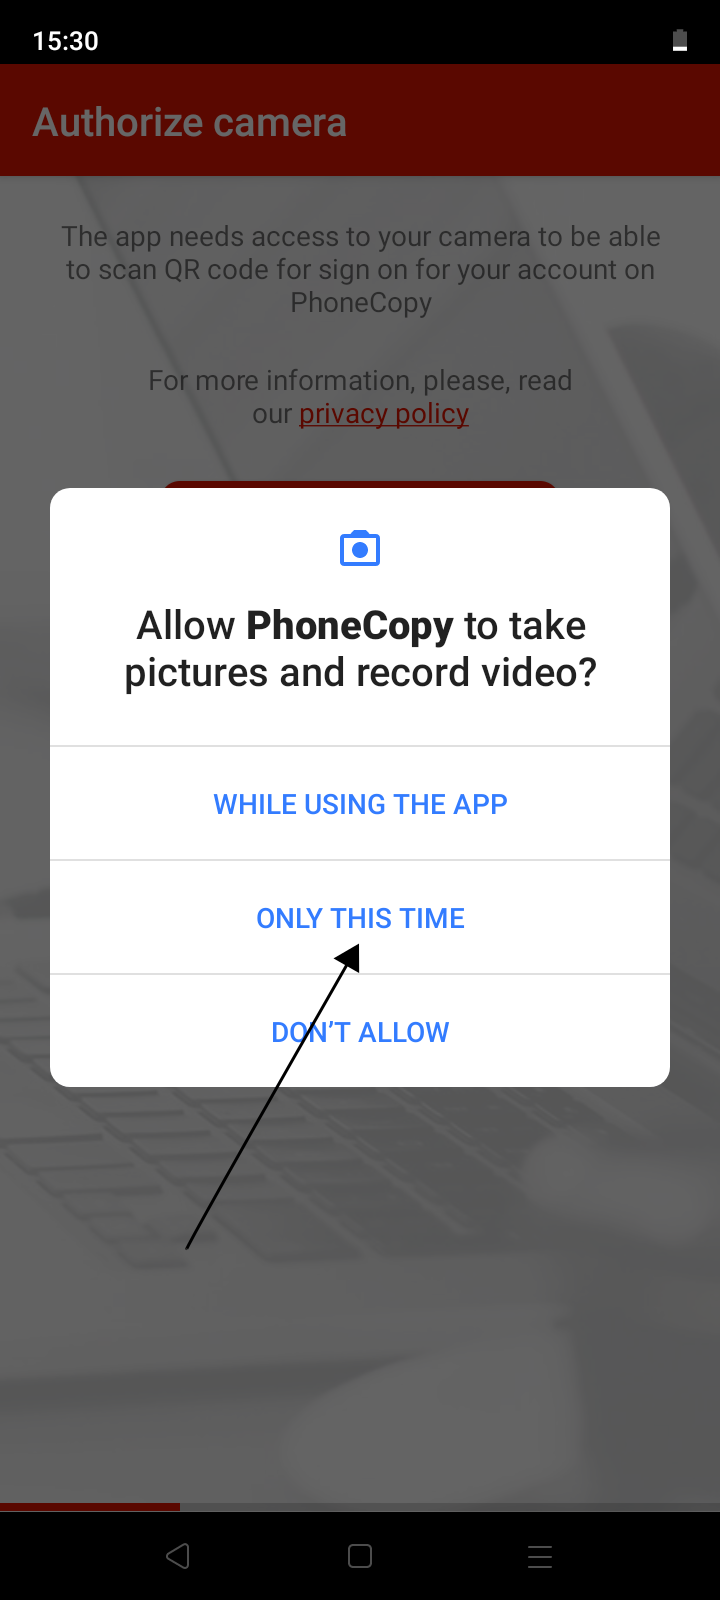
3. Allow access to the camera.

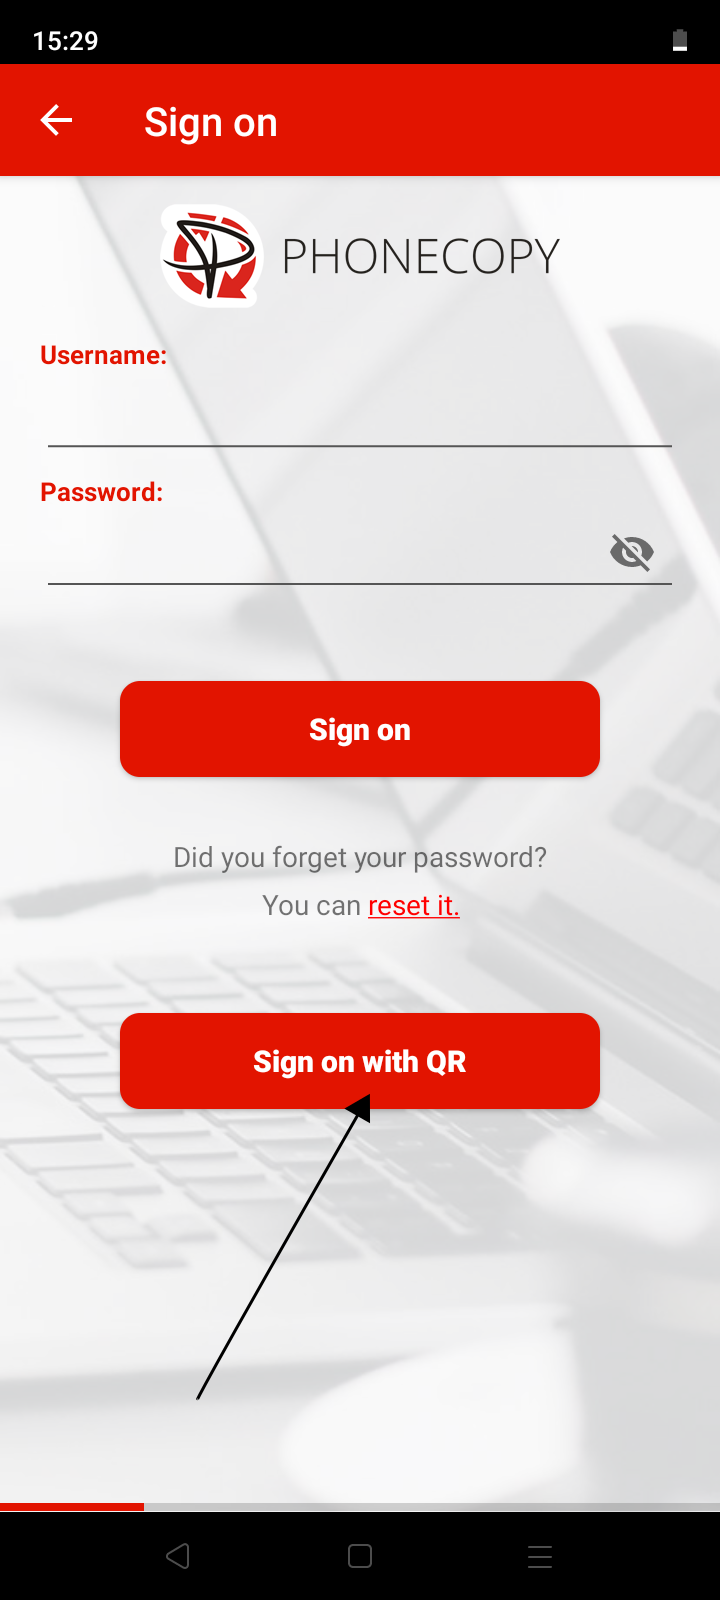
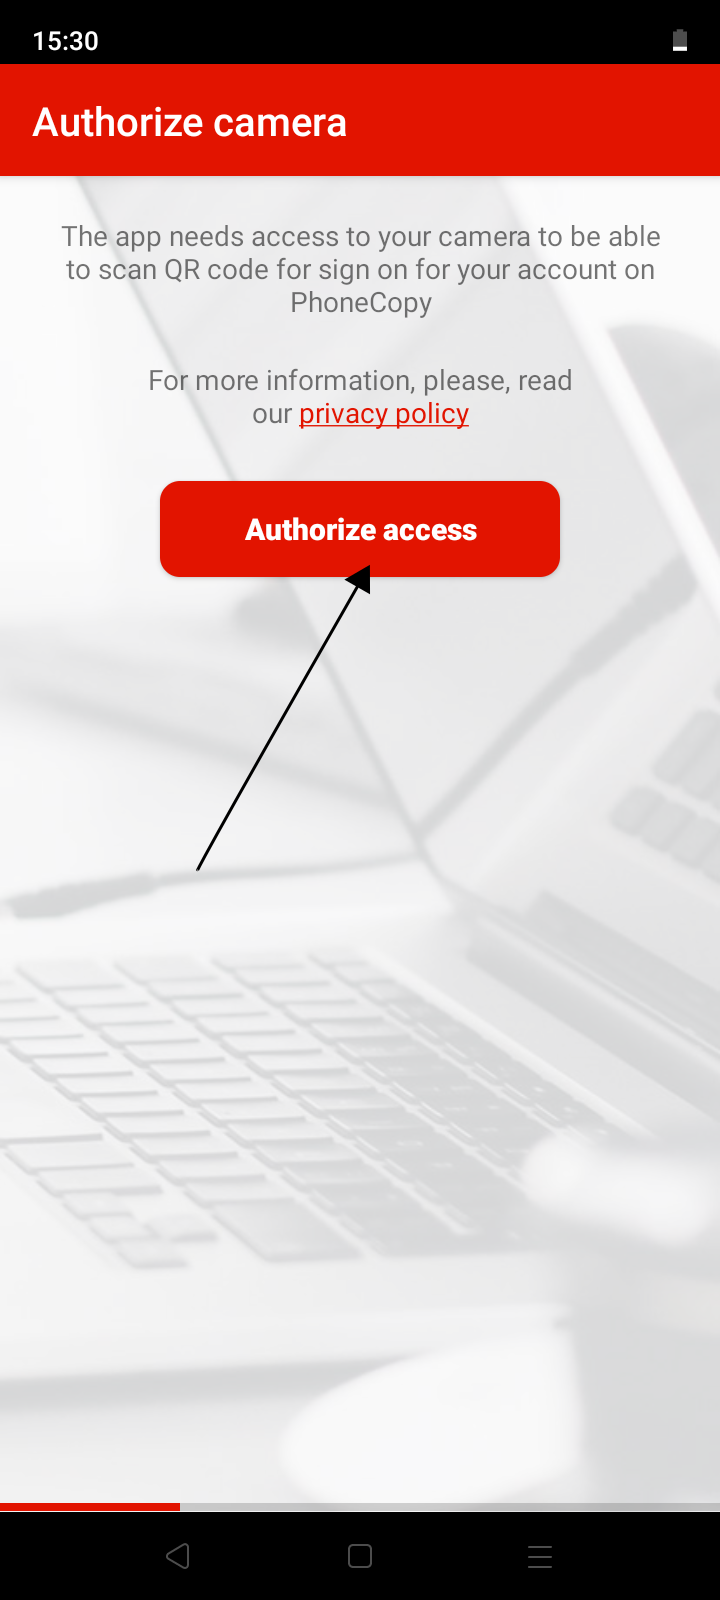
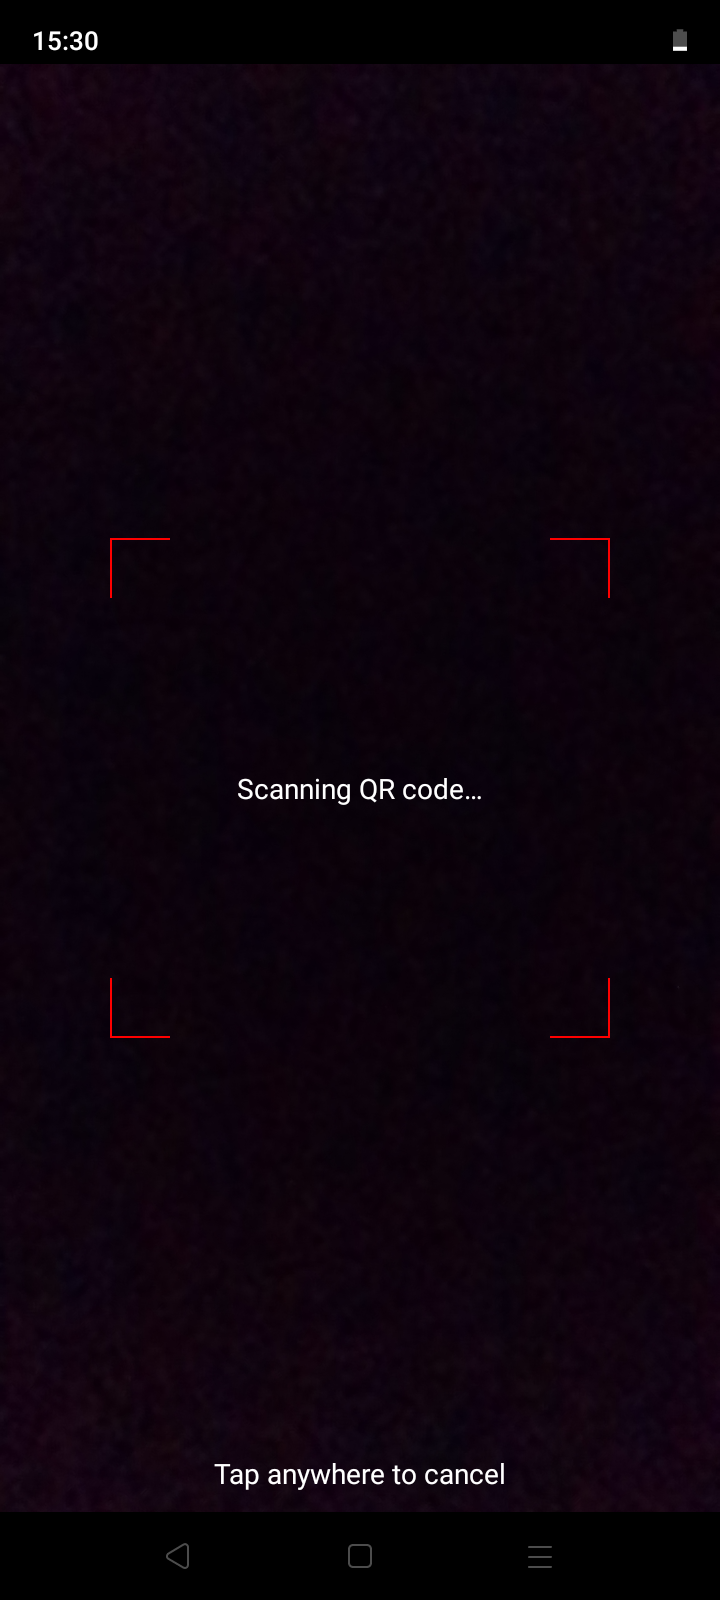
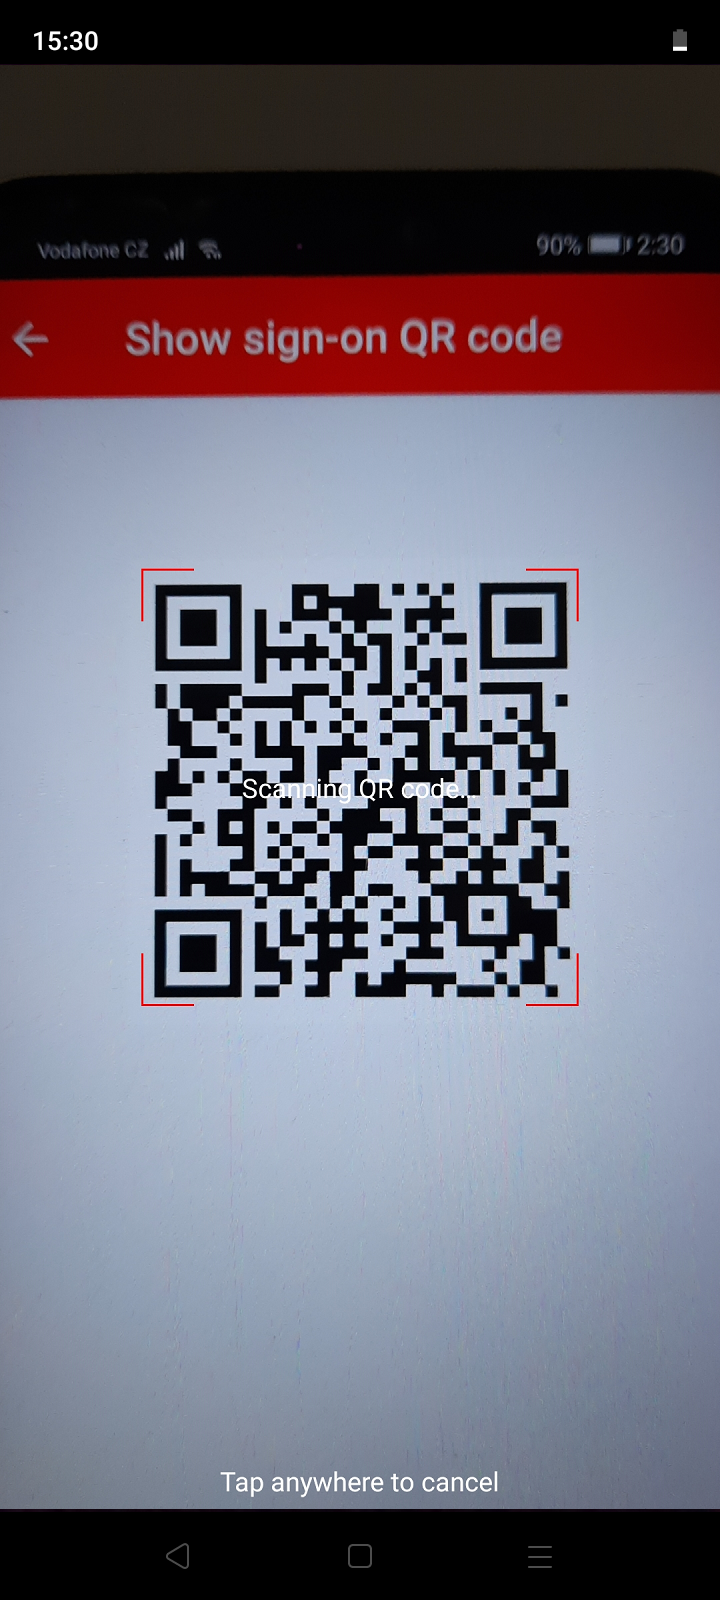
4. Aim the QR code that is displayed on the first phone so that it is placed in the red frame.
Using a Google account
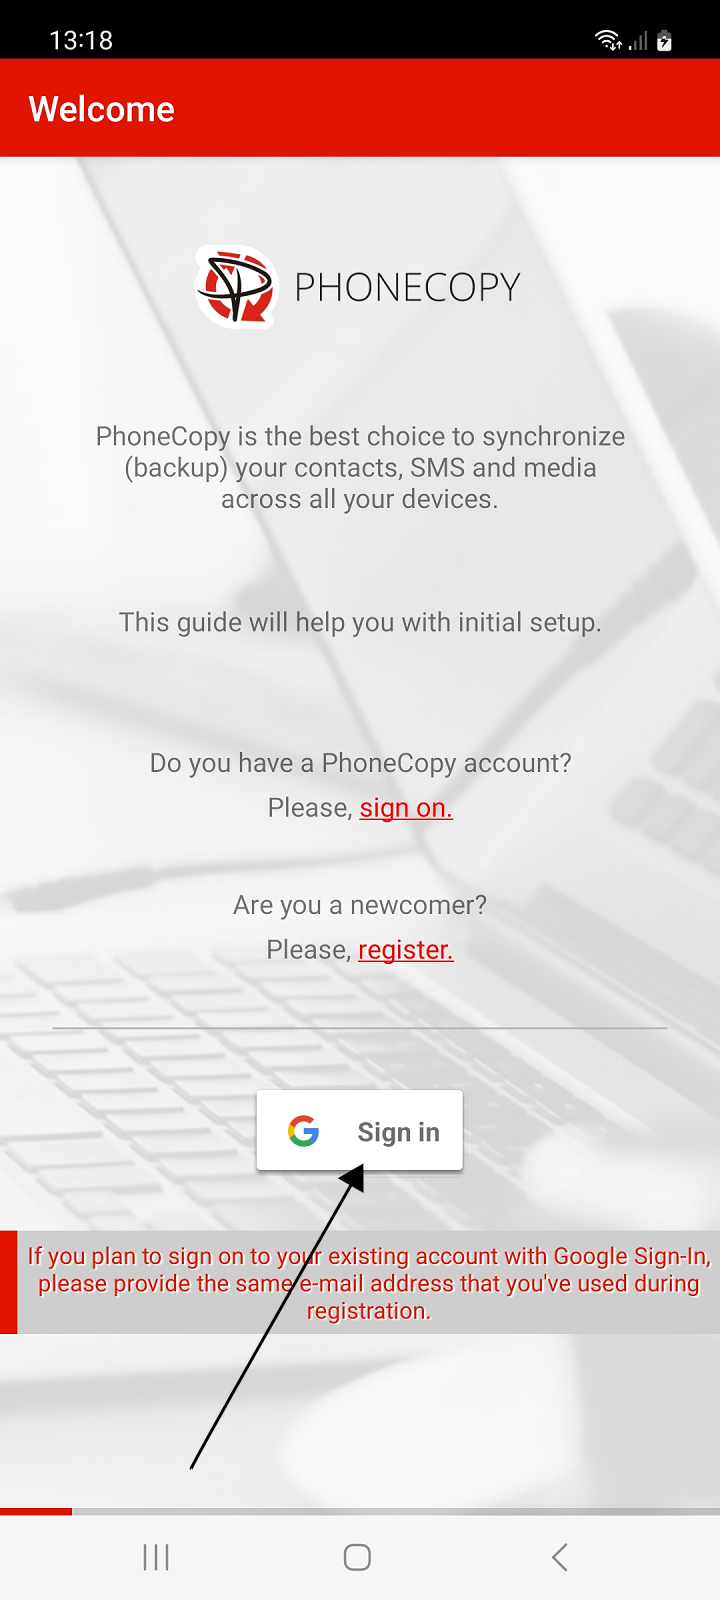
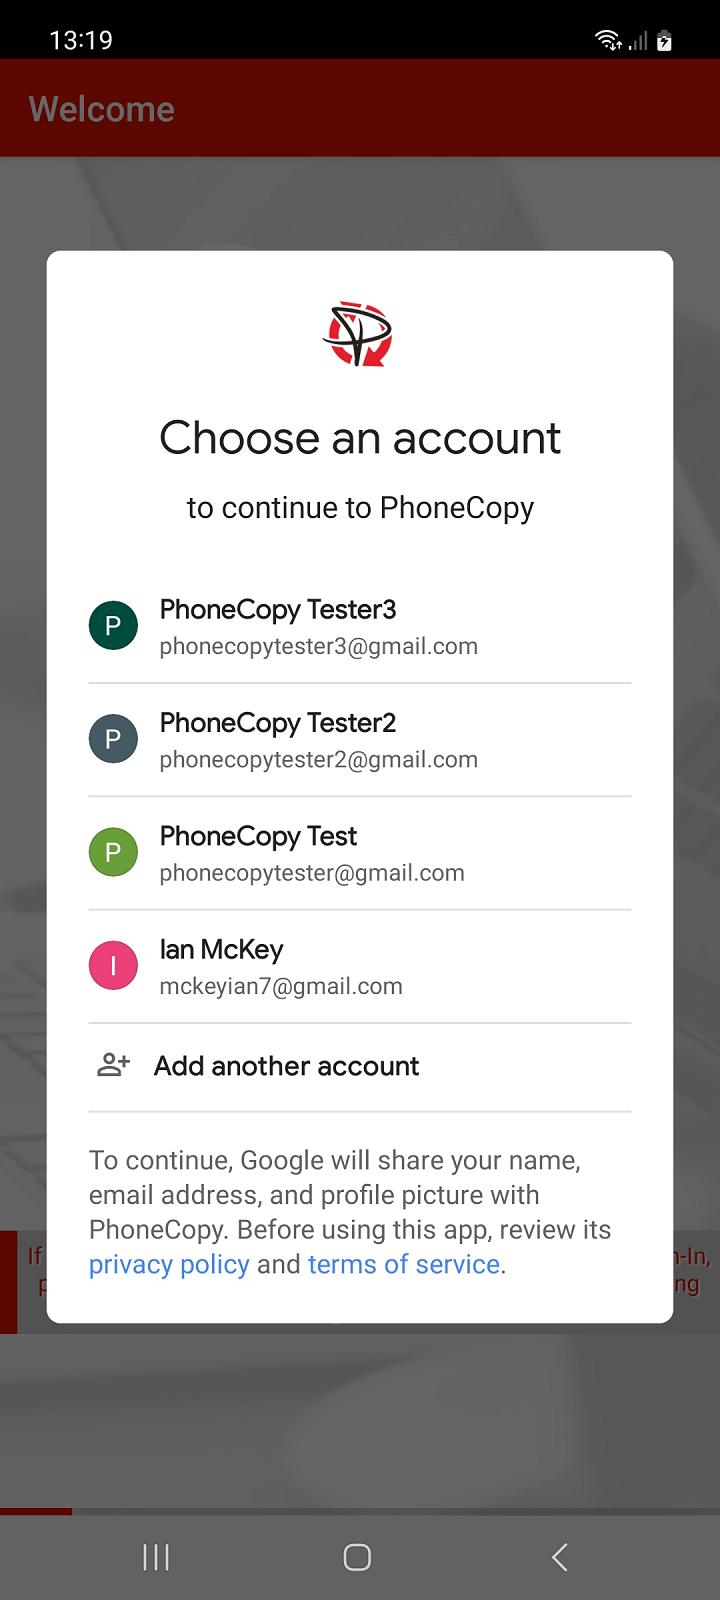
To log in to an existing PhoneCopy account, select the email address (Gmail) you used during registration. By choosing a different email address, you will register a new account.
Setup wizard
After successfully logging in to your existing account, the application guides you in addition to the basic backup settings for contacts, SMS, phone call records, photos and videos from your phone on PhoneCopy, as well as setting up synchronization with your already existing backup on PhoneCopy. Follow the instructions.
Contacts sync
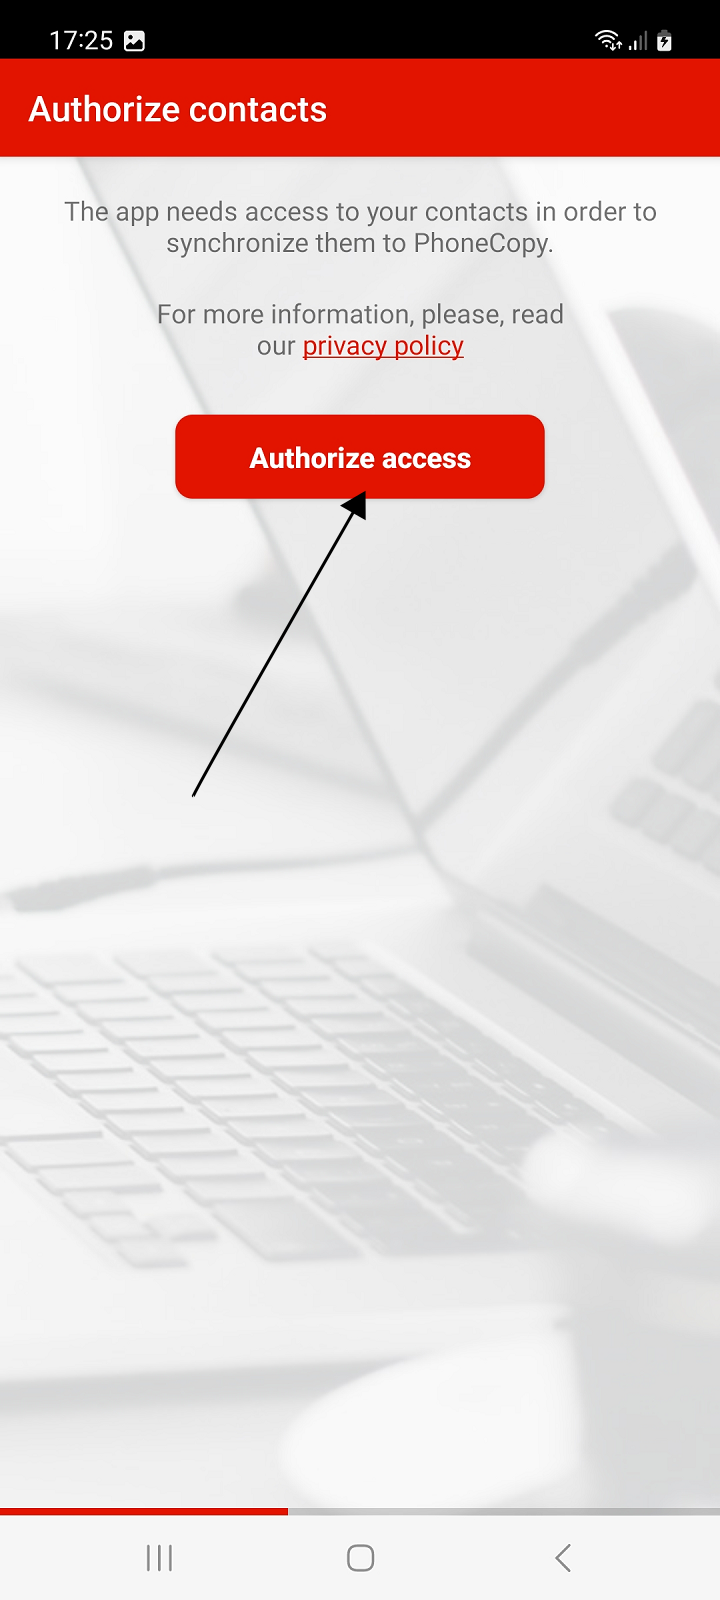
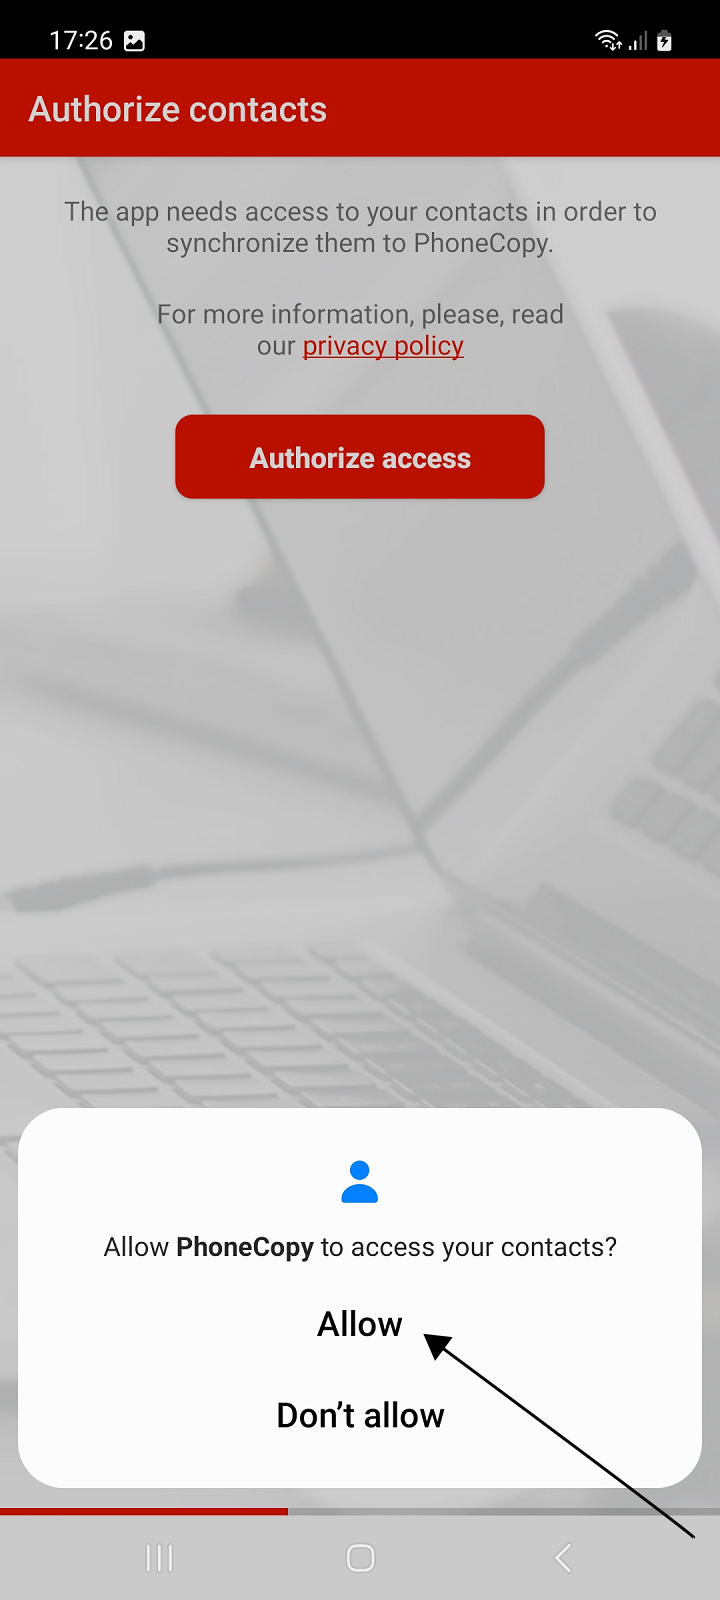
Allow access to contacts to back up contacts from your phone to PhoneCopy or restore contacts from your existing PhoneCopy backup to your phone.
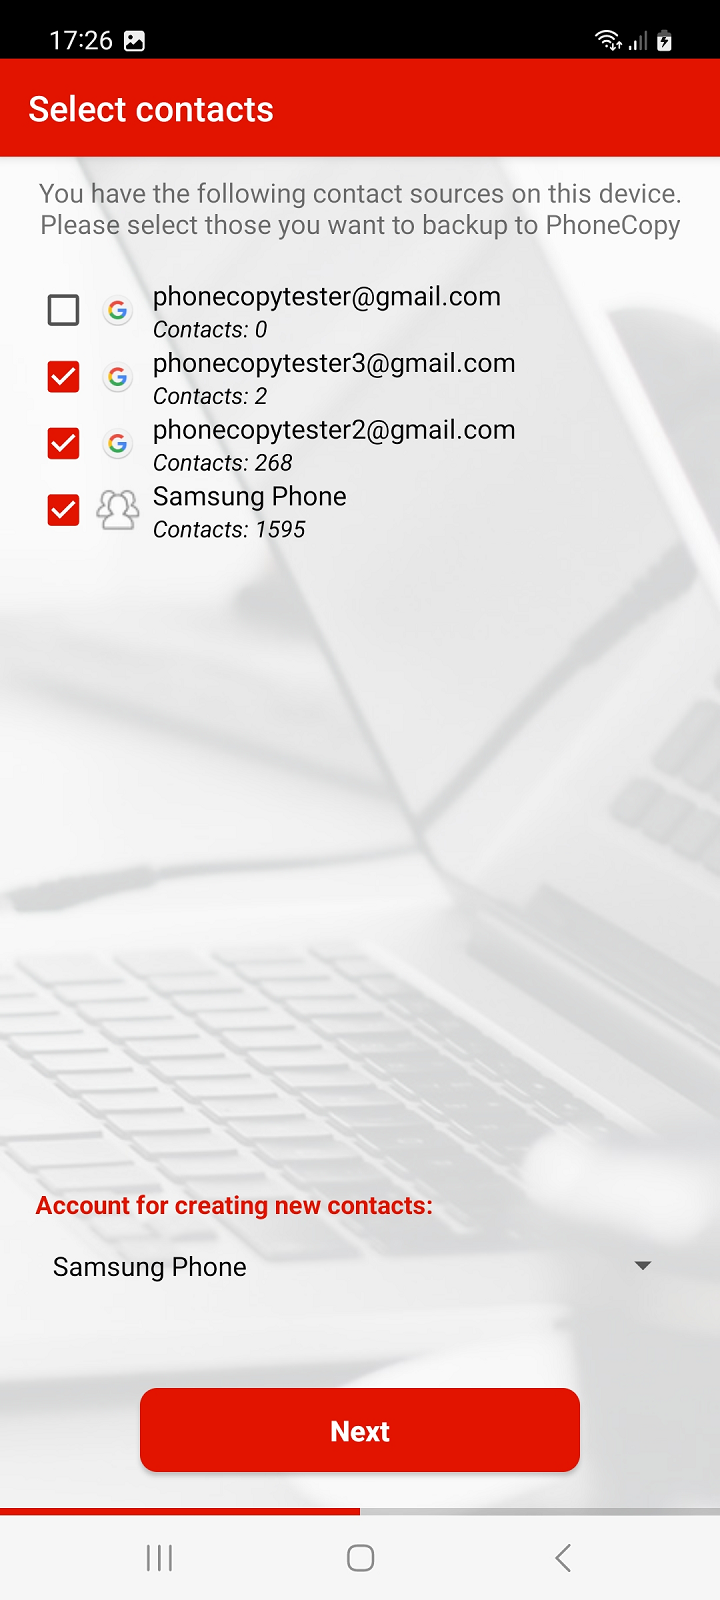
select the account with the contacts you want to back up or synchronize on PhoneCopy, or to which the contacts from the PhoneCopy backup are to be restored. Then click Next button.
Note: If you select multiple accounts with contacts to backup or sync, you must select one of those accounts to create new contacts. Contacts from your PhoneCopy backup, which were previously created in the web interface or were backed up from another of your devices, will then be added to this account. In the case of a new phone, we recommend using a local "Phone" contact account.
Recommendation: If you select a Gmail account for backup or sync of contacts, we recommend that you simultaneously turn off the synchronization of contacts from this account with Google.
WARNING: If you want to RESTORE your contacts from the backup on PhoneCopy to your phone, we recommend that you choose only one account to which the contacts from your backup will be restored. This way you can prevent unwanted contact losses. Before restoring the backup from PhoneCopy, contacts are first deleted from all selected accounts for synchronization. You can add additional accounts with contacts for backup or sync later in the Sources settings.
SMS sync
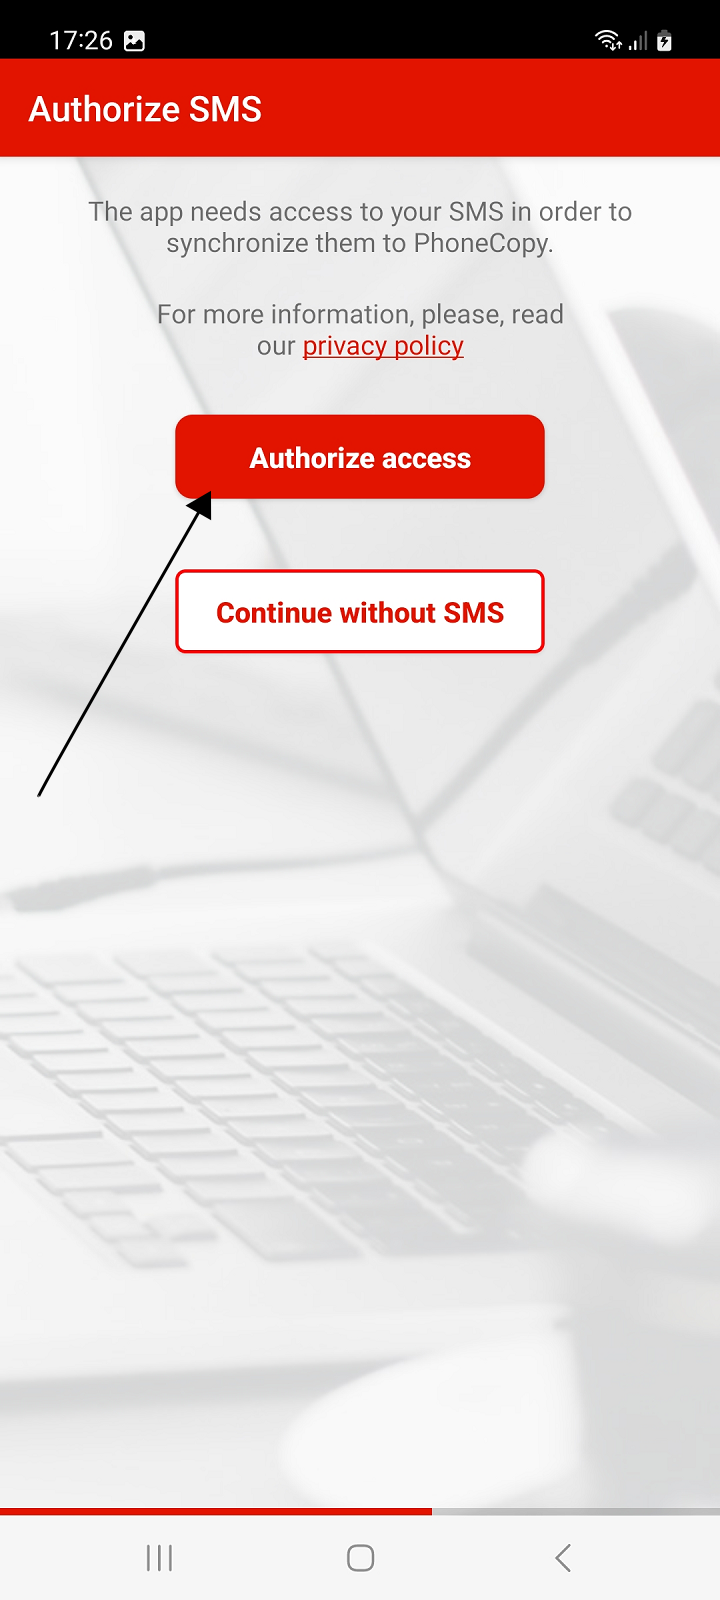
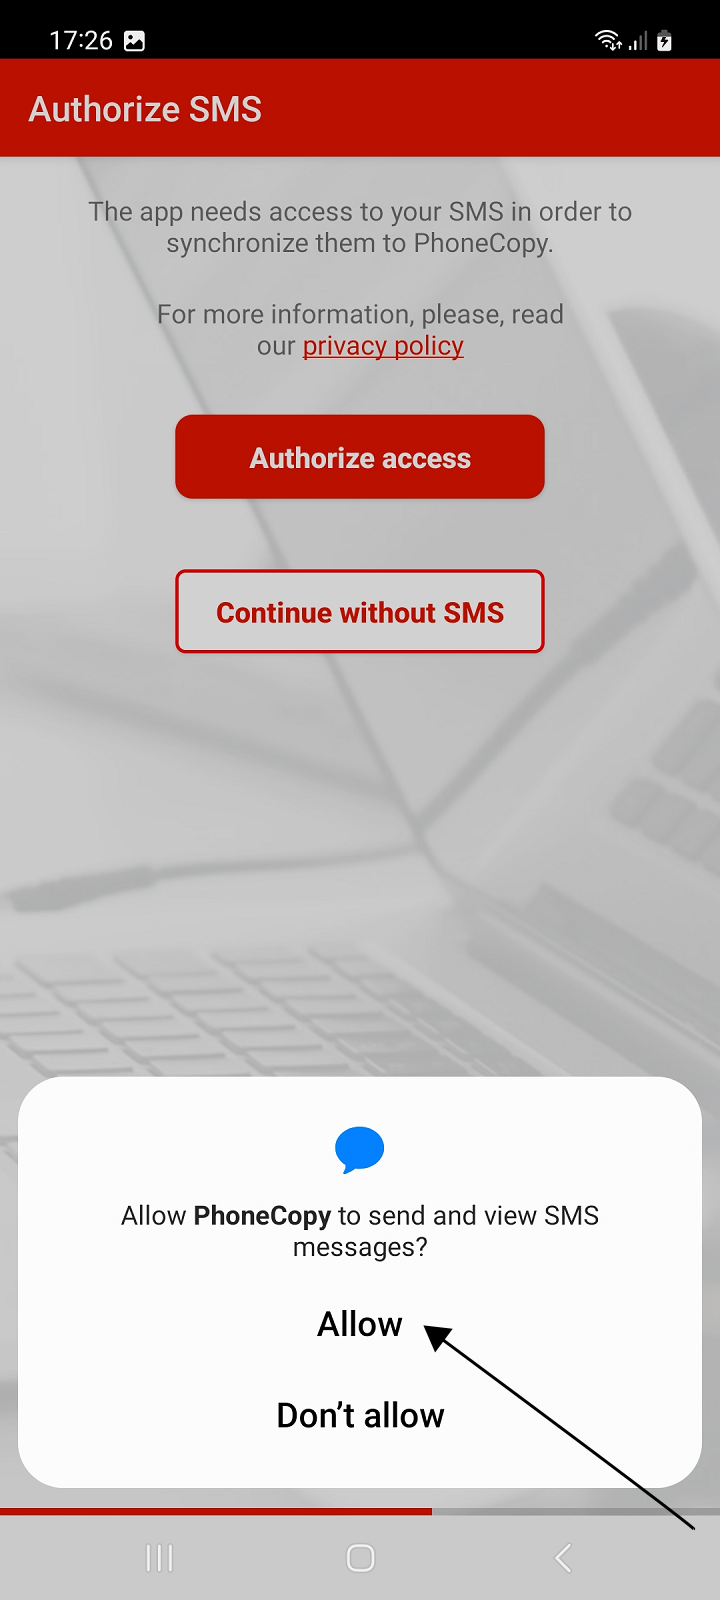
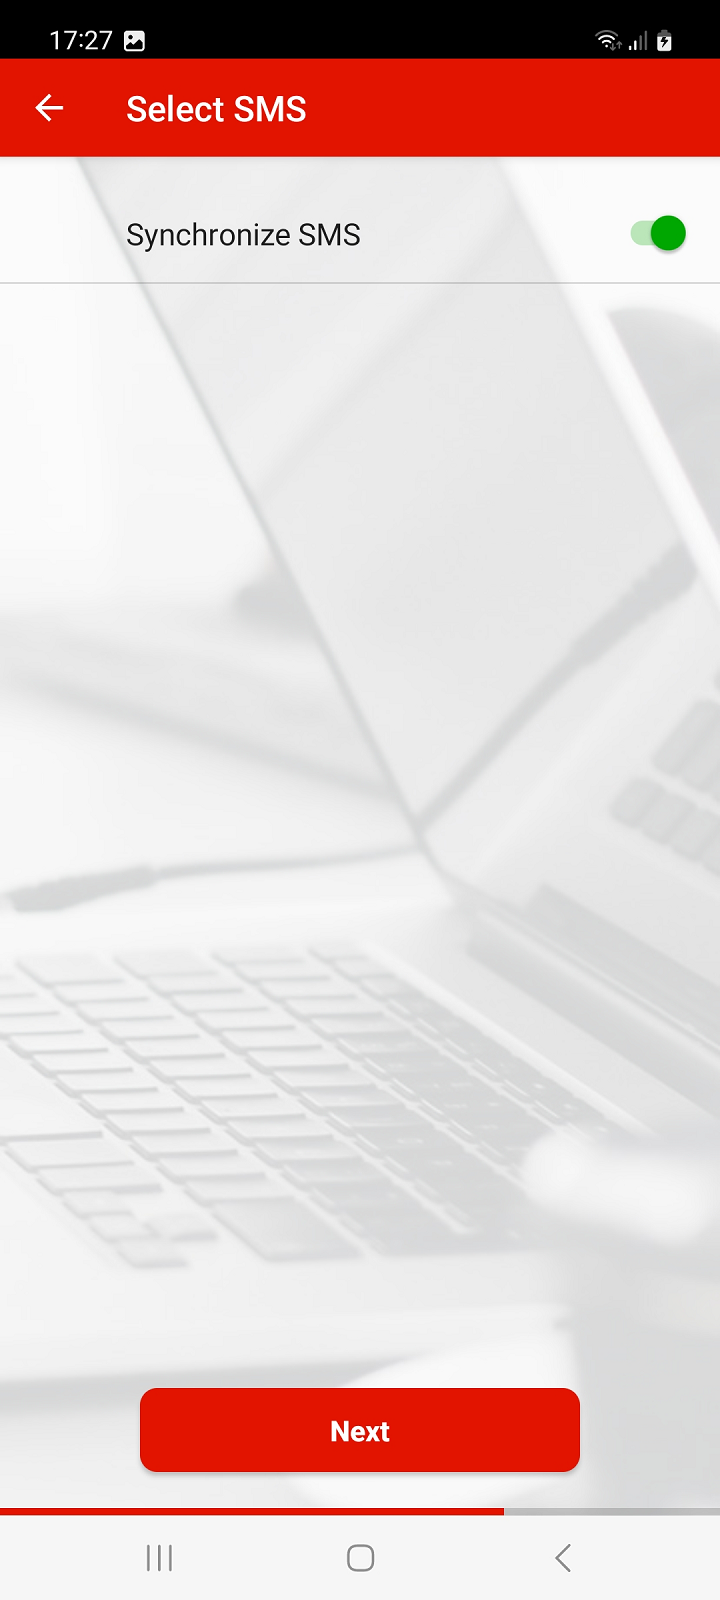
If you want to backup your SMS to PhoneCopy or restore your already backed up SMS from PhoneCopy to your phone, in the next steps authorize access to SMS, then enable Synchronize SMS and continue by pressing Next button.
Otherwise, press the Continue without SMS button to continue.
Note: Restoration of SMS is only available to Premium version users.
Media backup and restore (photos and videos)
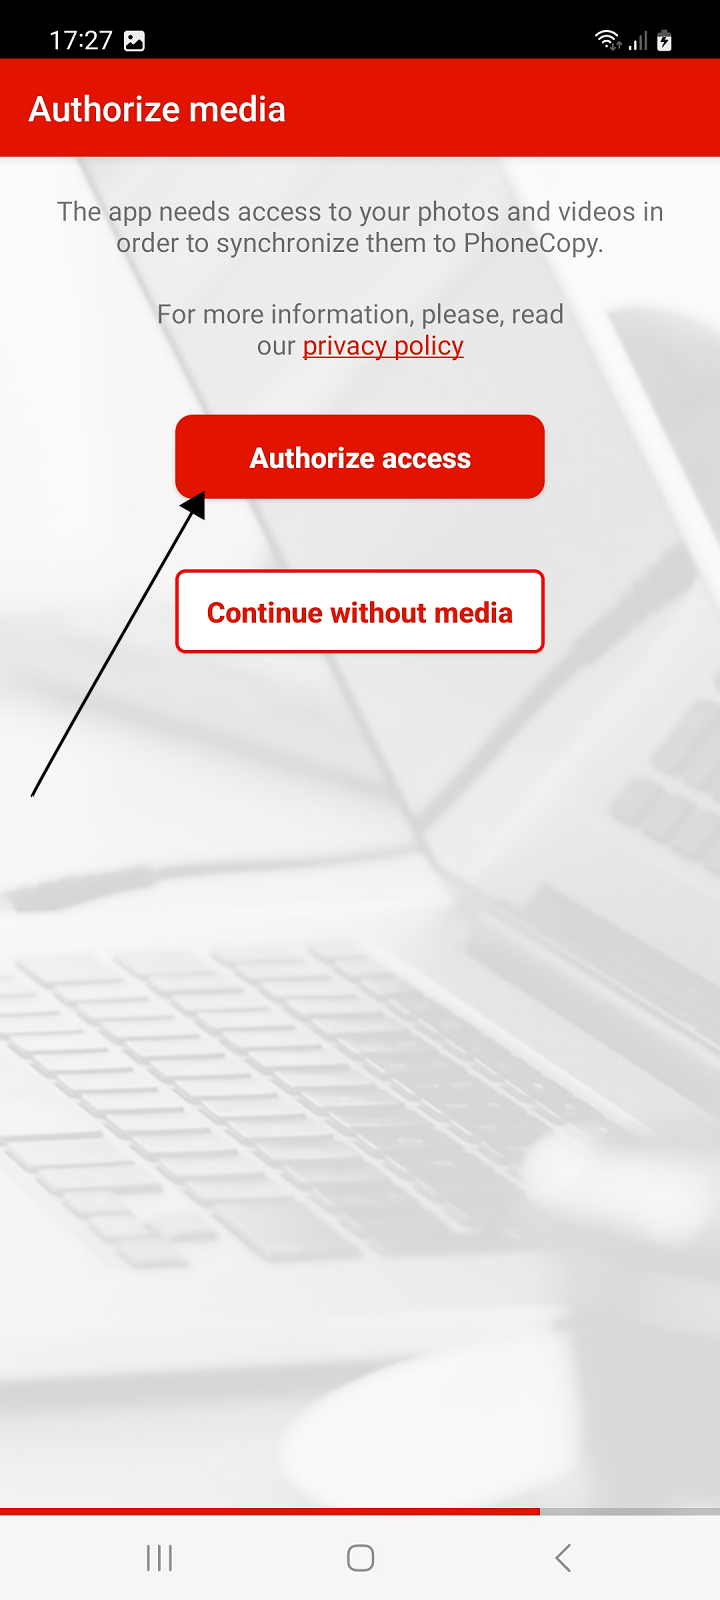
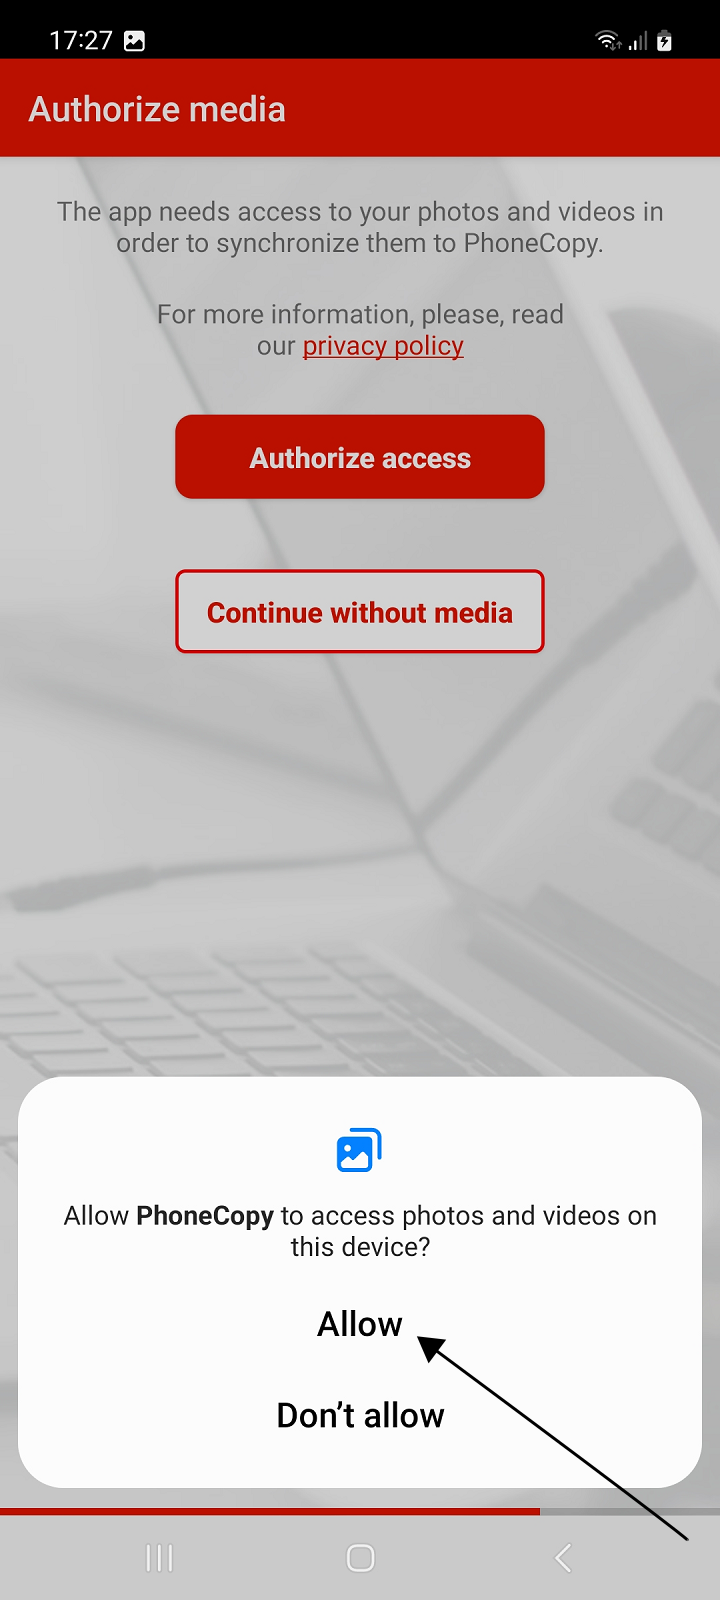
If you want to back up your photos or videos to PhoneCopy or restore your backed up media from PhoneCopy to your phone, authorize access to media.
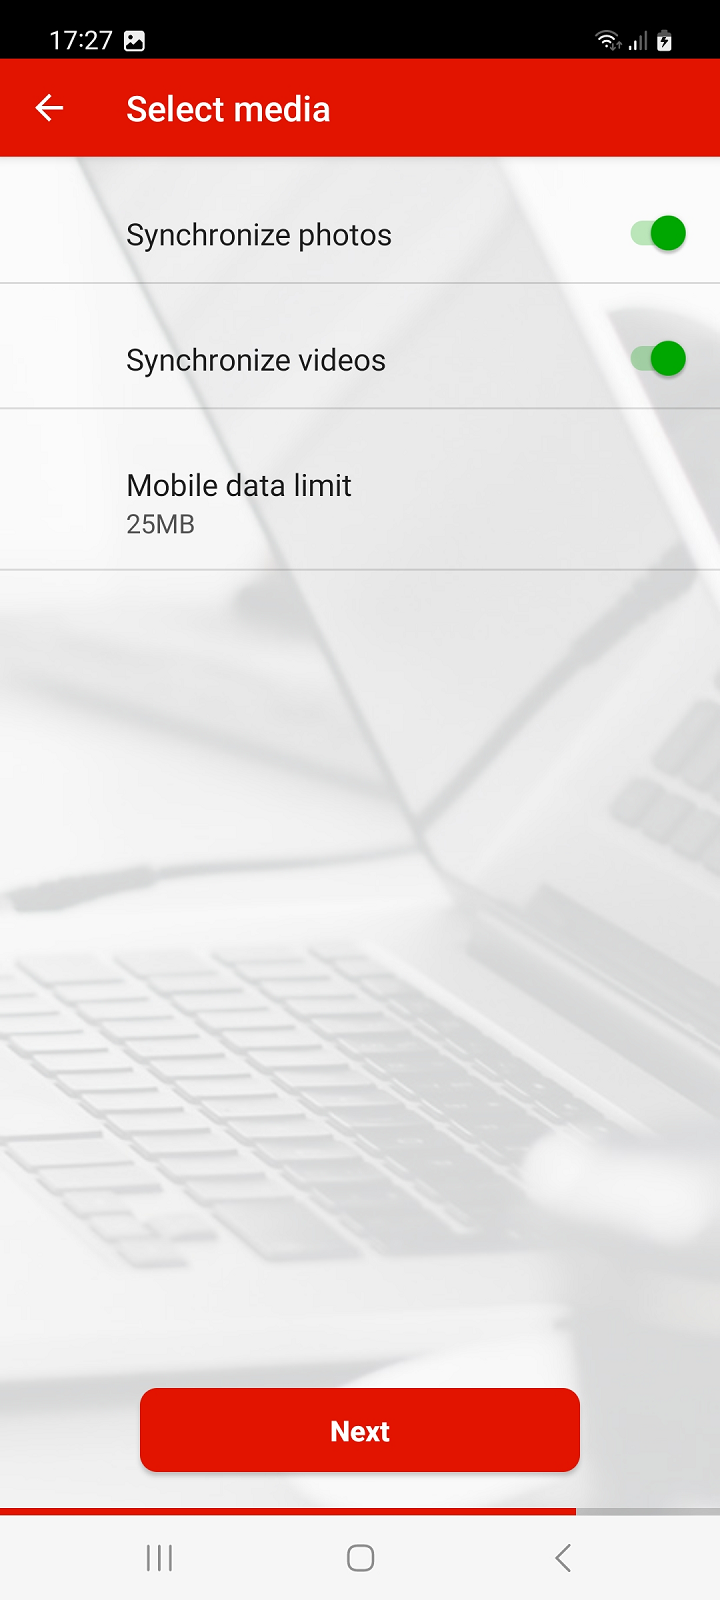
Then select whether you want to backup or restore photos and videos and enable Synchronize Photos and Synchronize Videos.
You can also set a mobile data limit to prevent it from running out. If you back up your media via mobile data, the backup will be interrupted when the reached limit is reached.
Continue with Next.
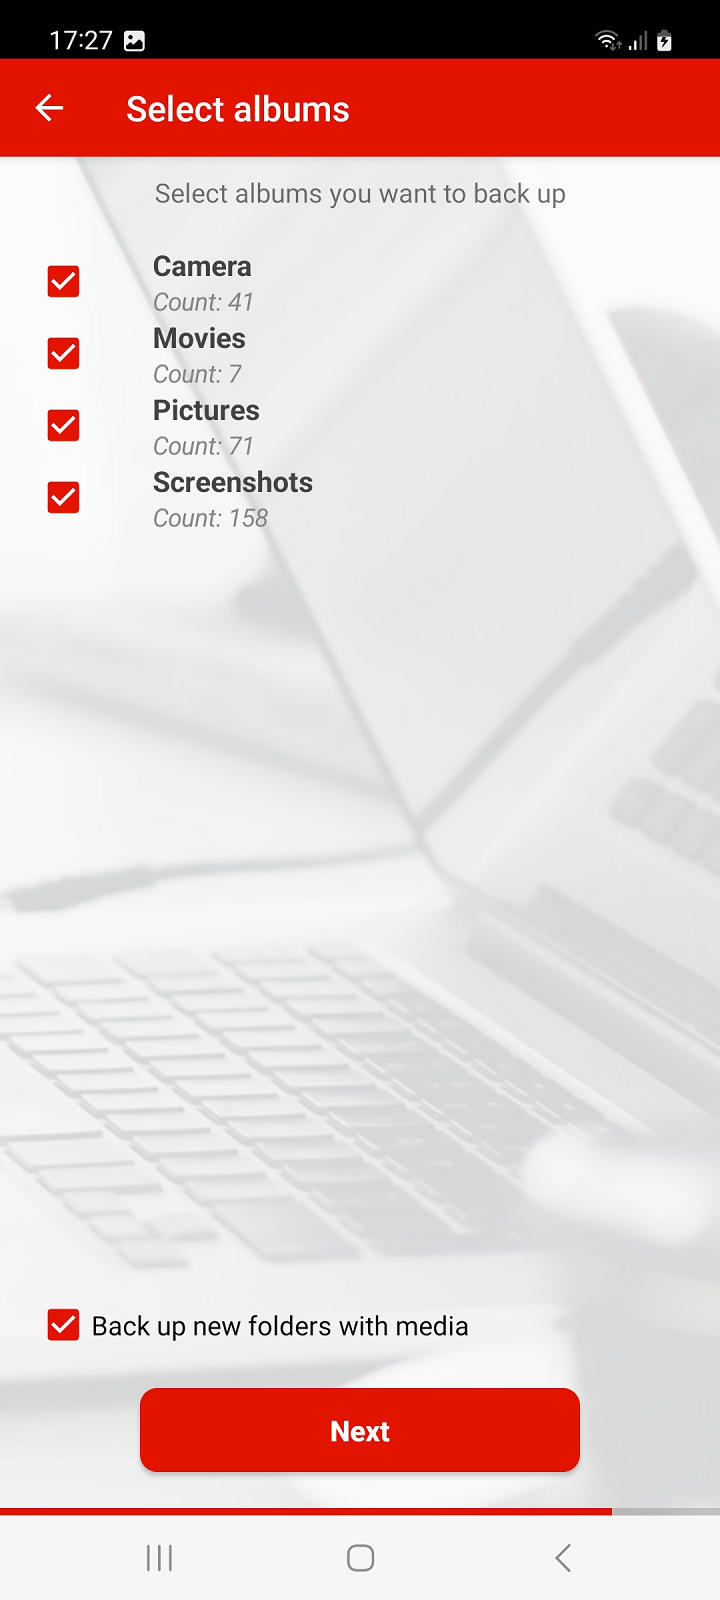
Then select the media albums on the device that you want to back up on PhoneCopy and continue by pressing the Next button again.
Restoring media from another phone
If you want to download to your new phone photos or videos that you previously backed up on PhoneCopy from another phone or device, select that device from the list on the following screen and press the Next button to continue.
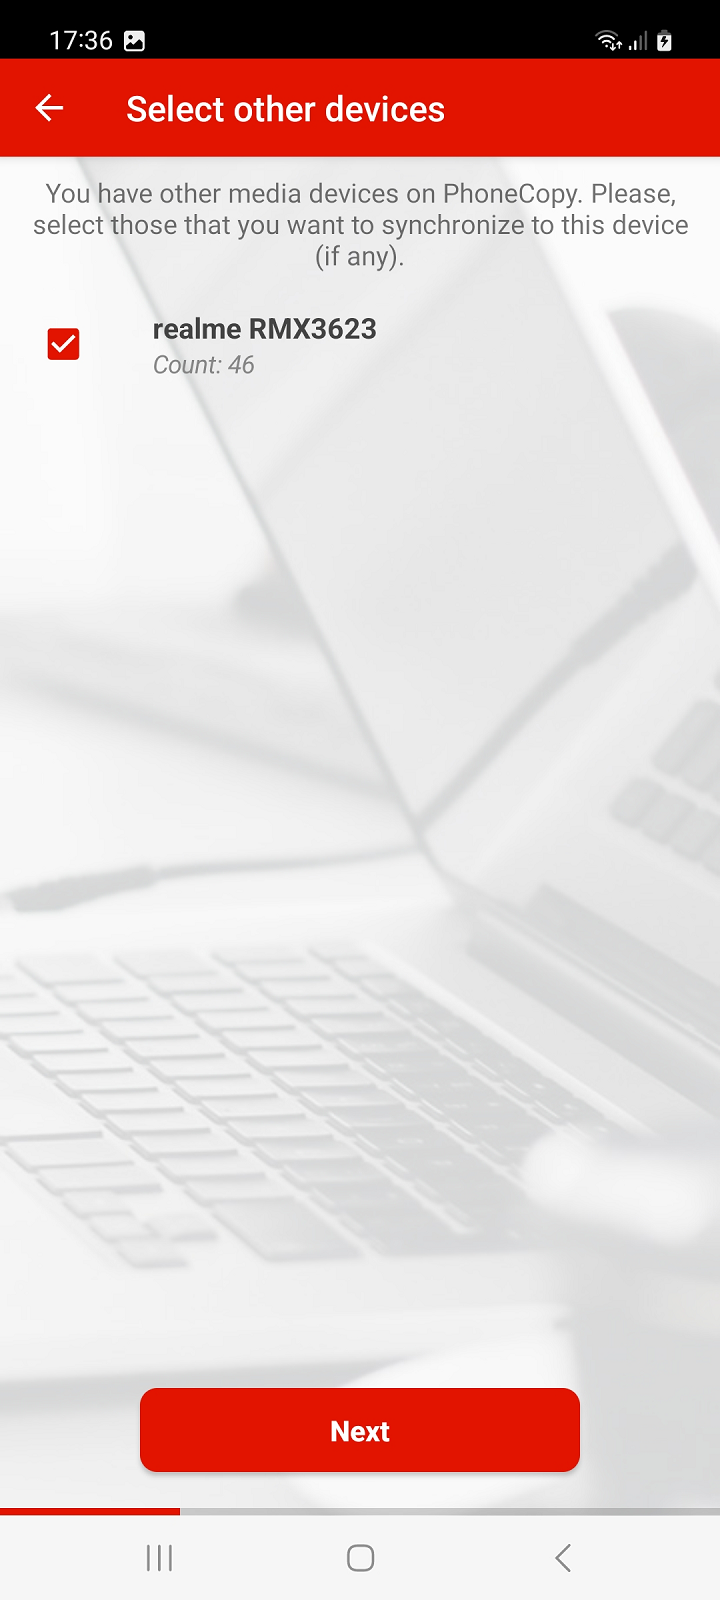
During synchronization with PhoneCopy, the backed up media from the selected devices will be created on your phone, in folders with the names of the individual selected devices from which they originate. These will be placed in the phone storage in folders according to their type, either in "Pictures" or "Movies".
If you do not want to back up or restore media, press Continue without media instead of allowing media access.
Call log backup
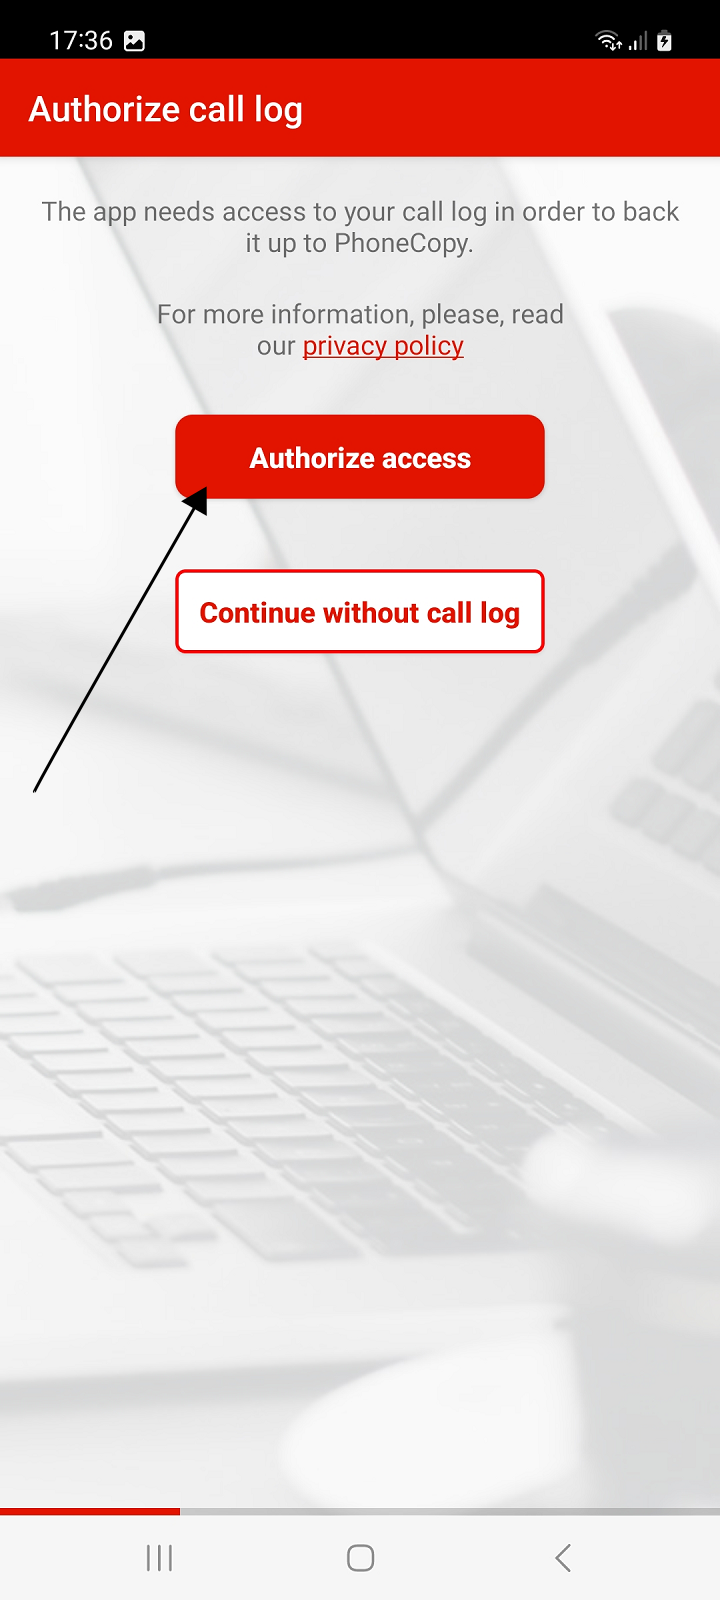
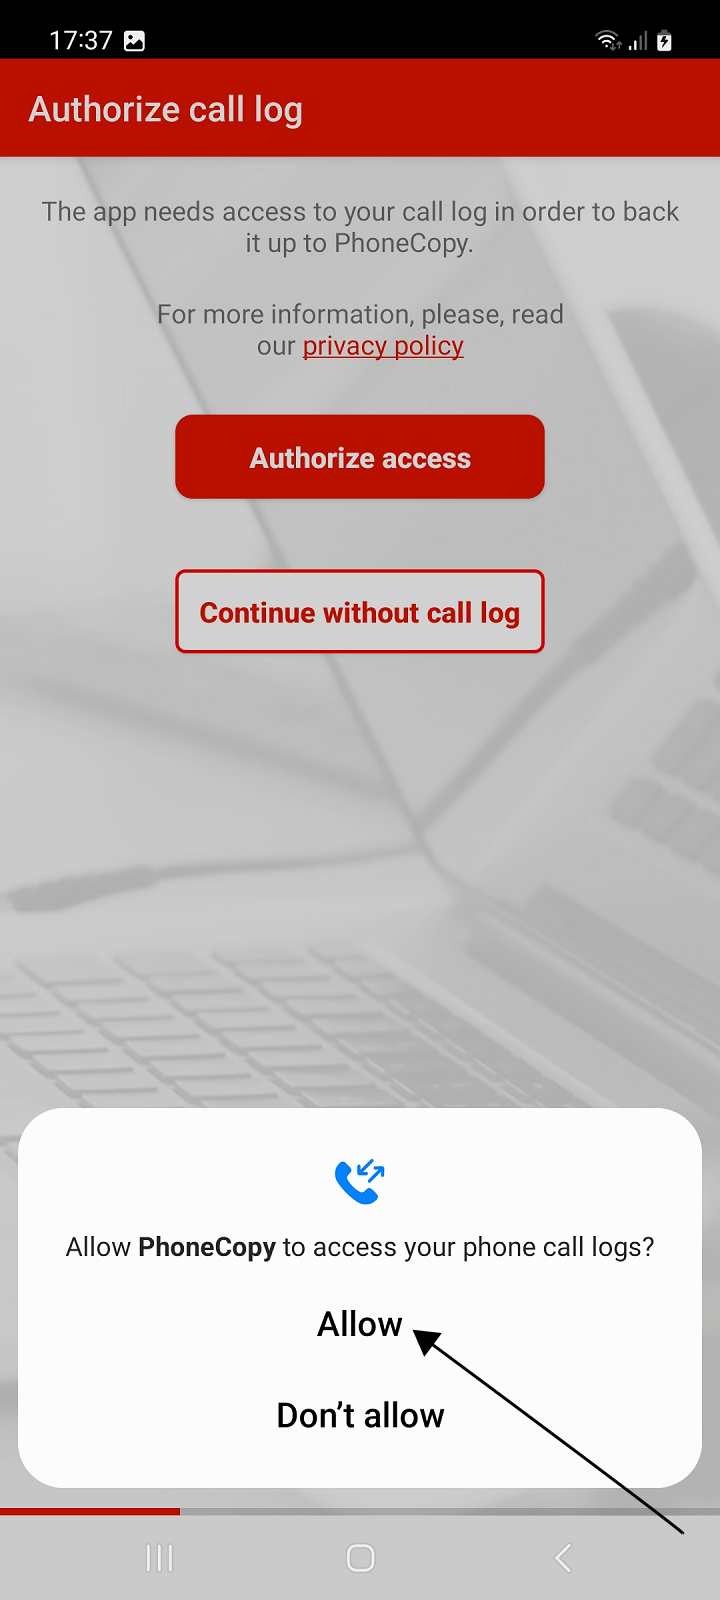
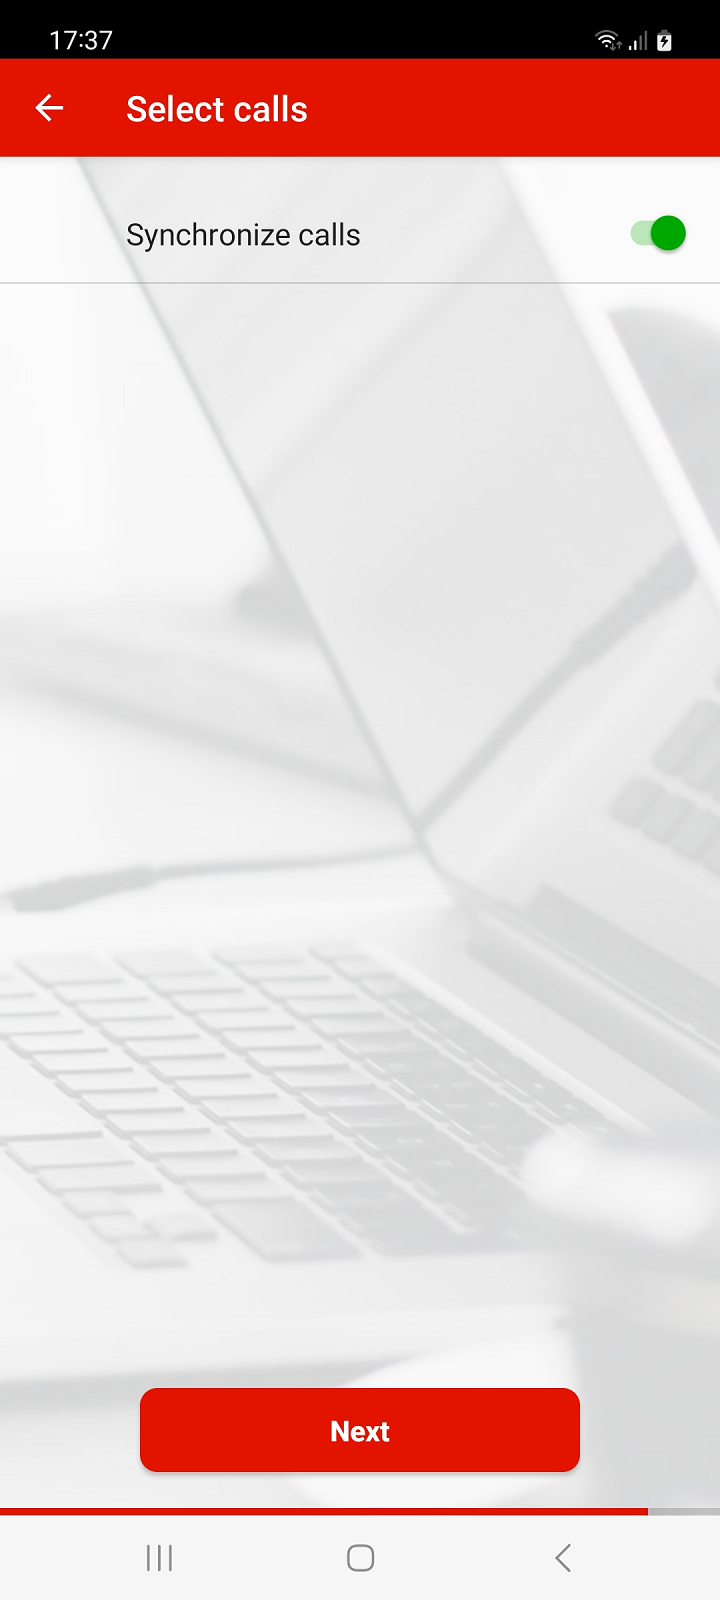
To backup your call log, in the next steps, authorize access to call logs, then enable Synchronize calls and press Next to continue.
If you do not want to back up call log, go to the next step by pressing Continue without call log.
Note: Call logs are only backed up on PhoneCopy.
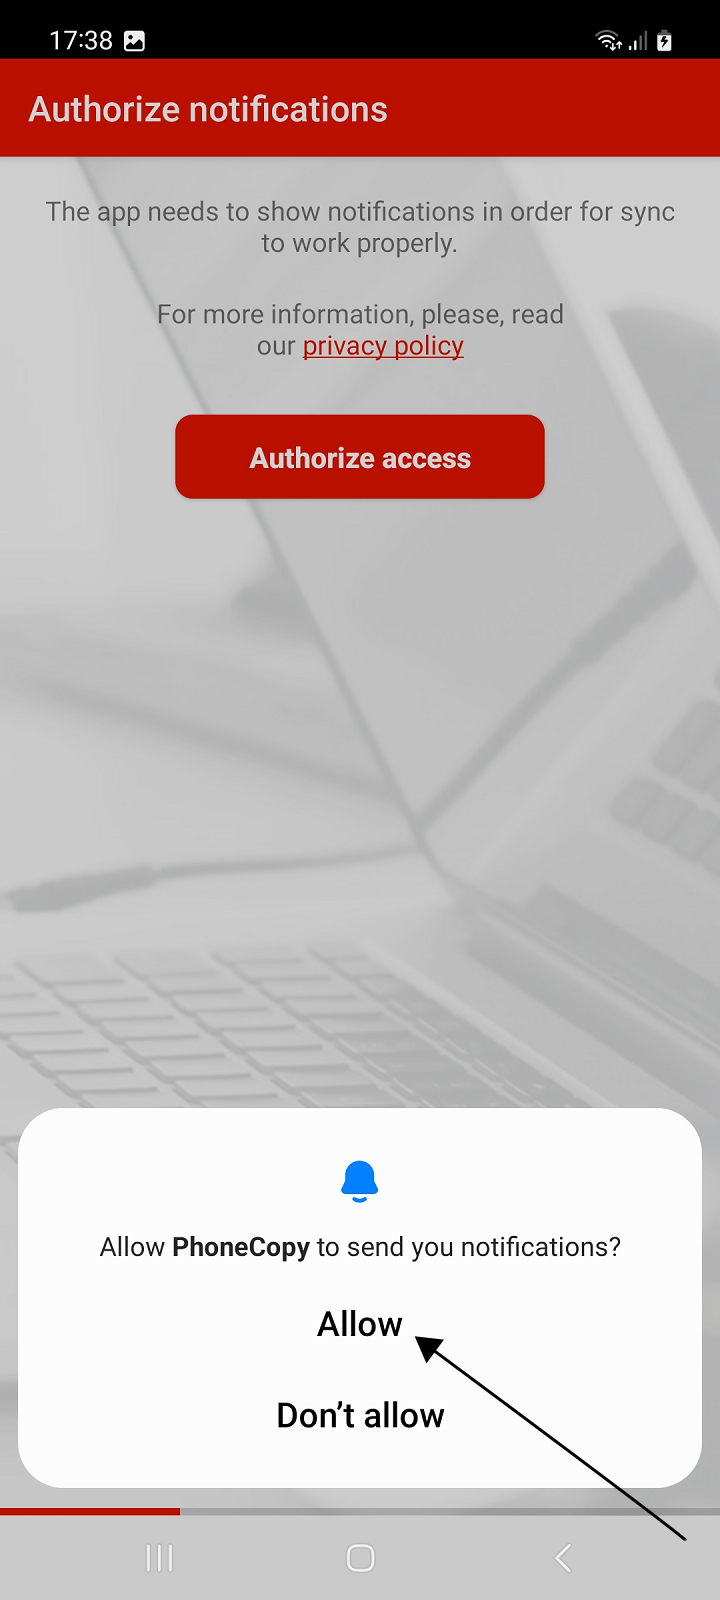
Allow notifications
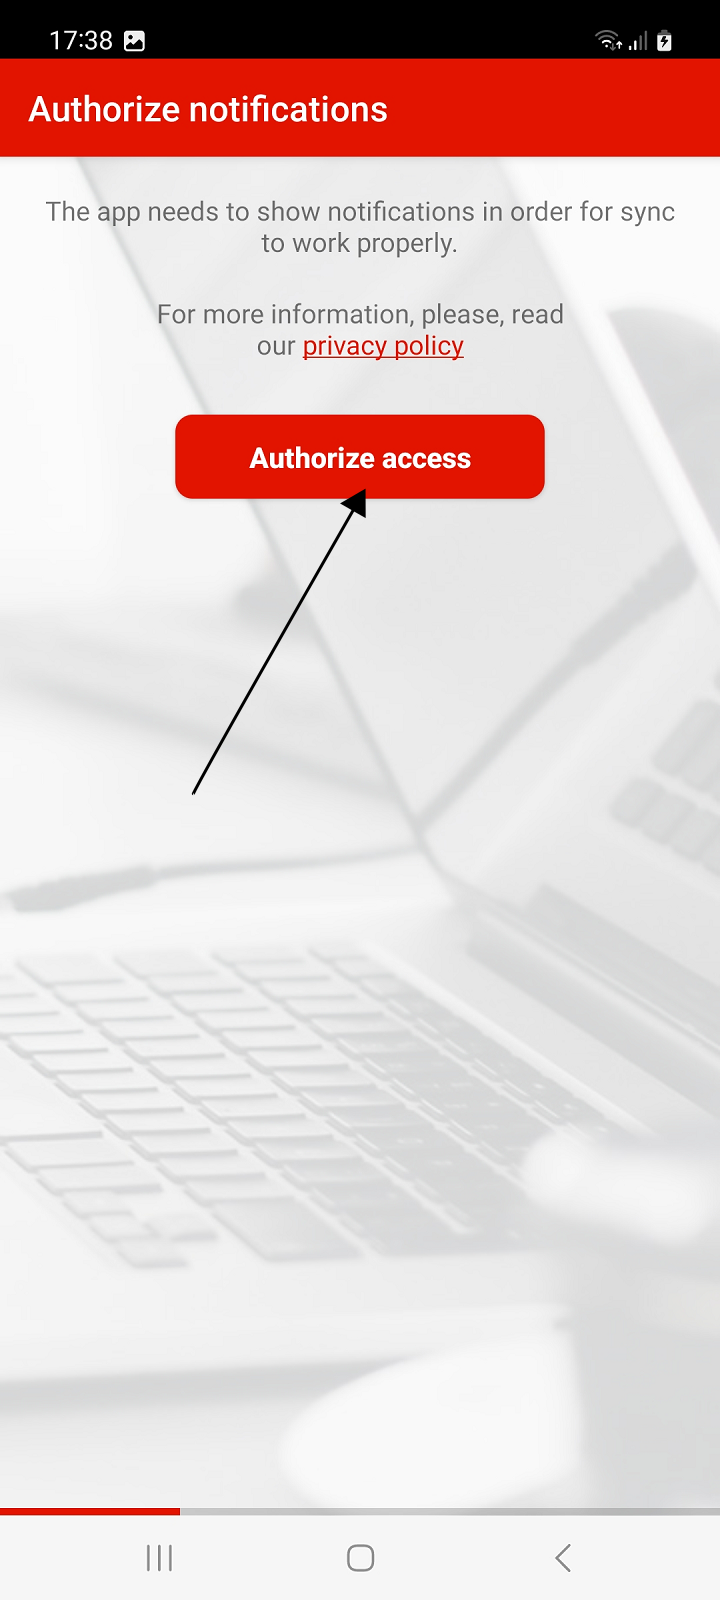
In Android 13 and later, apps must ask the user for permission to send notifications.
In order for synchronization and backup to work properly, the application must display notifications. Without notifications, the app will not work properly.
On devices with older versions of Android, this step will not appear.
Allow the app to show notifications. Then the final screen of the setup wizard will appear.
Restore to phone
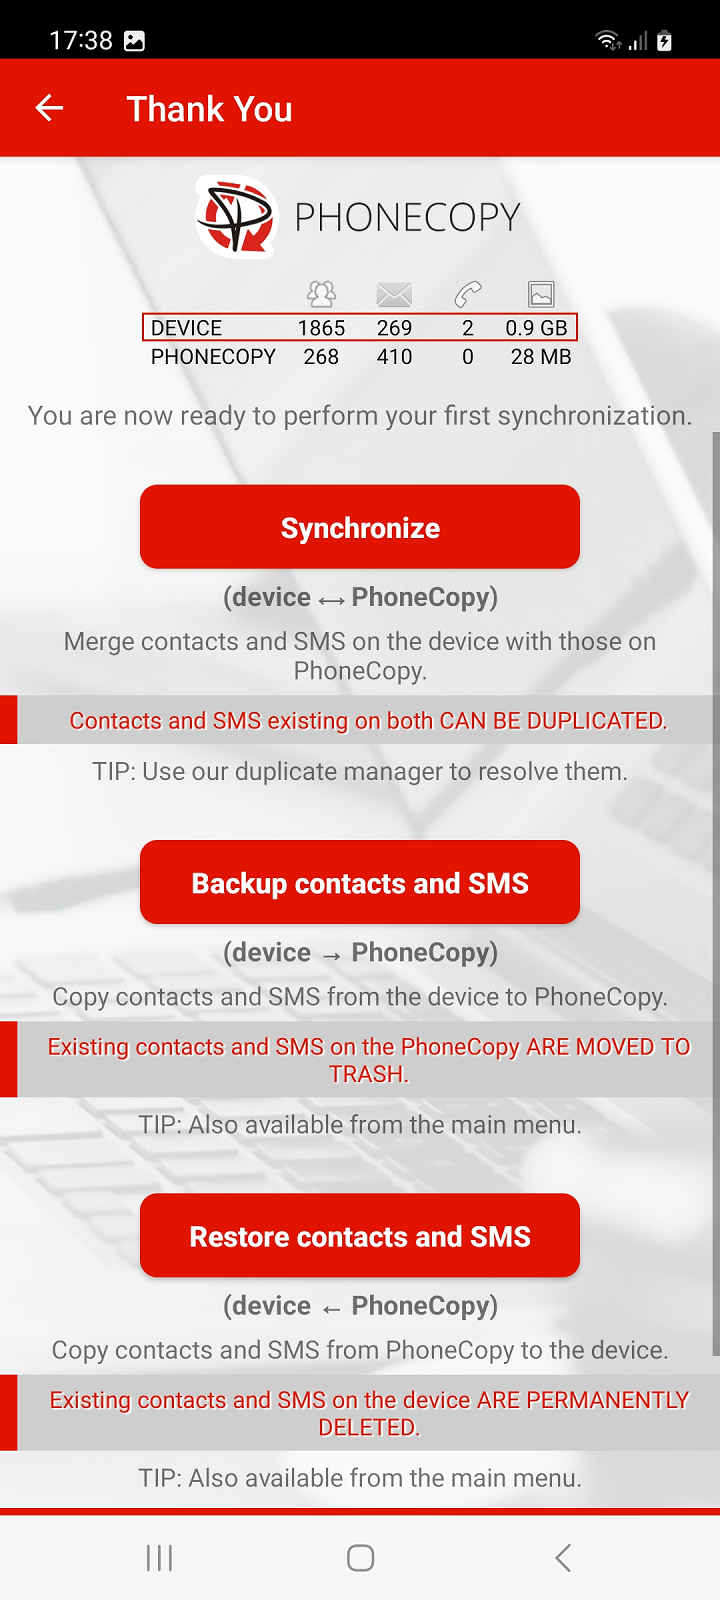
The last screen of the setup wizard shows a simple summary of the items from the device that have been selected for backup and the items already backed up to PhoneCopy.
To Restore your backed up of contacts, SMS or photos and videos from PhoneCopy to your phone, select Restore (Device ‹ PhoneCopy).
Contacts, SMS, photos and videos from PhoneCopy are copied to the device. Existing contacts and SMS on the device will be permanently deleted.
Tip: The action is also available later from the main menu.
If you have contacts or SMS on your new phone that you don't want to lose, use option Synchronize (device - PhoneCopy).
Contacts (and SMS) from the device will be merged with those backed up on PhoneCopy. If both sides contain identical contacts or SMS, these items may be duplicated.
Tip: To resolve duplicates, you can use our duplicate manager in the PhoneCopy web interface.
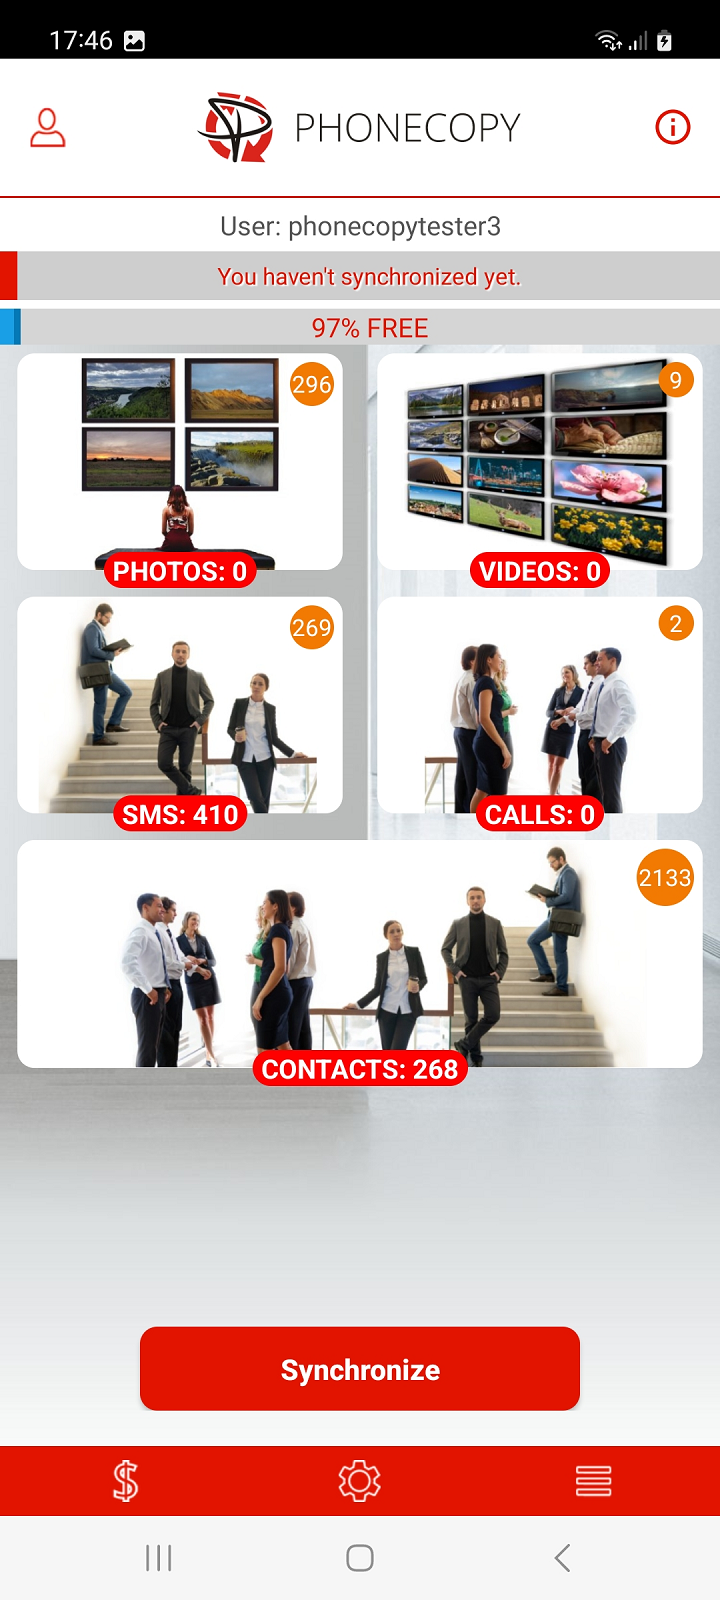
Select Later if you want to postpone the synchronization or restore the backup until later. The main screen of the application will appear.
This guideline also works for similar devices like Realme 9 Pro 5G (rmx3471), Realme 9 Pro plus (rmx3393), Realme C21Y rmx3261, Realme C25 rmx3265, Realme GT Master Edition, Realme GT Neo 2 5G (rmx3370), Realme Narzo 30 5G rmx2156, Realme Narzo 50A rmx3430, Realme X2 RMX1993, Realme X50 Pro 5G rmx2071.
Once everything is done, check your data on the web. Login to PhoneCopy webpage and you will see brief review of all data transferred from your device. With another mouse click, you can review the change of each particular item.
Some additional tips:
On your online account, you will see full history of your contacts, as well as the data that you've deleted in between the synchronizations. You can find them in an archive from where you can restore them. And if this is still not enough of a backup for you, you can download a CSV file, that you can store in your computer.


